Manual
What Is LearnDesk?
LearnDesk is a learning management system. This software is designed to create, distribute, and manage educational content.
It is a platform where system admin can add instructors and students to enrich and share their knowledge through a structured course-based system. In this management system, an instructor can create courses, documents, and videos based on their expertise.
This software system is mainly an open-source learning management script. It is mainly a PHP script. Thus, you can organize it in a customized way. Since it is an educational software system, you can use it in different educational institutions, organizations, or individual cases. So, it is a fully combined package for online and class room education.
LearnDesk application contains mainly three types of users, but they are using the same platform. Admin, mentors and Learners. System Admin can create different users and provide them different roles to manage the system. System Admin can manage everything from the admin panel and assign roles for others to work with the platform. Mentors or instructors can create multiple courses with lessons and tests. They can create the course outline with articles, audios, videos, images, docs, PPT, PDF, assignment, survey and tests/quizzes according to their expertise.
What LearnDesk does?
LearnDesk is a e-learning platform. It also has the ability to manage an individual training institute or a group of institutes. However, here, you can:
- Create organization
- Manage branches
- Manage batches
- Manage Classroom
- Manage course
- Manage students
- Manage Information hub
- Manage assignments including class test if needed
- Make quiz, survey, and exam tools
- Manage payment from different payment gateway
- Explore the course portal
- Create wishlist
- Course outline with articles, audios, videos, images, docs, PPT, PDF, assignment, survey and tests/quizzes
- Manage different events
- Filter the course portal for a perfect result
- Manage users and profile
- Upload or import users from others
- Assign roles and privilege
- Learners has different option to manage their courses
- Manage basic control of entire system
- Instructors can sell and manage their course
- Assign multiple instructors for one course
- Monitoring entire system - login, who is doing what etc.
- Messaging between course instructor and students
- Manage entire site control including home page customize display facilities
- Manage and control ebook
- Manage and control blog
- Manage, control and booking tuition
- Manage & control affiliate program
Who is LearnDesk for
This learning management system is an e-learning platform where the system admin can manage users to share skills and knowledge. LearnDesk is beneficial for:
Learner: The student or newly recruited employee who wants to enrich their knowledge and skills.
On this platform, learners can purchase or subscribe to a course for enrollment. They can start or continue their enrolled course from the last preview. They can also browse courses and make wishlists. In LearnDesk, a student can apply to become an instructor.
Instructors: Who wants to crate and sell the course in their expertise subjects.
An instructor can add, remove, and update the lessons, quizzes, and attachments. They can also overview sales and payout settings. An instructor can earn income by sharing a percentage of the course price after selling the course on this platform. Also, an instructor can continue messaging, and discussing lessons with admin and enrolled students.
Admin: The authority who operates the application, manages the user's panel,
An admin is a user who has the highest number of privileges, permissions, and responsibilities in LearnDesk. The admin has to manage the entire system to operate the application.
In this platform, an admin can:
- Create users.
- Manage course and category.
- Configure and update the entire system settings.
- Accept/reject the application for the instructor.
System Requirements
LearnDesk-Learning Management System is very simple to install and easy to configure on your web server. If required, we also offer a free installation service of our LearnDesk on your web-server.
Your system need to have Minimum PHP 5.6+ (or PHP 7.0, PHP 7.1, PHP 7.2, PHP 7.3, PHP 7.4) installed on a web server. LearnDesk has been deployed successfully on both Apache and IIS web servers and tested with Minimum PHP 5.6 and MySQL databases at the backend.
Operating System
Linux, Unix, Windows
Web Server
Apache Web Server, IIS (with ISAPI_Rewrite installed)
PHP Version
PHP 5.6 or above with PHP XML extension enabled.
Database
MySQL 5.5 or above
Optional Requirements
- Apache's mod_rewrite() extension to allow for SEO friendly URLs.
- PHP LDAP library is required to use LDAP functionality in the Enterprise edition
- AntiWord (free) is required to index and search Microsoft Word 2003/XP documents
- ppthtml (free) is required to index and search Microsoft PowerPoint 2003/XP documents
- PHP zip library (free) is required to index and search Microsoft Word/PowerPoint 2007 documents
- pdftohtml (free) is required to index and search Adobe PDF documents
If you're unsure whether your server meets these requirements, simply contact us with your FTP details and we'll check for you free of charge.
Apache (Recommended)
LearnDesk will work on Apache 1.3 or Apache 2.x hosted on UNIX/Linux, OS X, or Windows. The majority of Learndesk development and deployment is done on Apache, so there is more community experience and testing performed on Apache than on other web servers. You can use the Apache 'mod_rewrite' extension to allow for SEO friendly URLs.
Microsoft IIS
LearnDesk will work using IIS 7, IIS 8 or later, if PHP is configured correctly. To achieve SEO friendly URLs you may need to use a third party product. For IIS7 (or later), you can use the Microsoft URL Rewrite Module or a third party solution such as ISAPI_Rewrite. ISAPI_Rewrite is Apache mod_rewrite compatible URL rewriter for Microsoft IIS.
Disk Space
A minimum base installation requires at least 500 MB of disk space but you should assume that your actual disk space will be somewhat higher. For example, if you upload file attachments and images for assignment or course content, the actual disk space for Learnesk could easily be 1GB or more (exclusive of database content, media, backups and other files)
The total file size of installation will depend on what you add to your Learning System, but core files alone will take up approximately 250 to 300 MB uncompressed.
Browsers
All modern browsers are supported (IE7+, Firefox, Safari, Google Chrome, Opera) that support CSS and JavaScript.
Technical Support
We offer free technical support for a period of 6 months from the date of purchase. You can always ask us for installation support by email us alam5664@gmail.com. We will be happy to assist you. Customizations and personalized development are not included in the package, but are available separately.
Web application frontend
Homepage

Figure 1. LearnDesk Frontend Homepage
Users may access the majority of the view pages without logging in. When users access LearnDesk for the first time without signup, they will see the Course Search option on the home page and see the top courses and the top 10 latest courses as set by the system admin.
Course categories menu

Figure 2. LearnDesk Frontend Course Category Menu
On the left side of the home page, a course menu with a drop-down menu includes categories and subcategories. Category and subcategory Select a specific category. Can view all courses in the department at once.
Course search bar

Figure 3. LearnDesk frontend search bar
Users can find a course using the search box above. Can use the search bar to locate the required courses. System admin has the option to hide or view the search bar.
Cart page
Cart option will be found when the learner or instructor loged in the system.

Figure 4. LearnDesk frontend Shopping Cart
When learners add their favorite courses to their add to cart, the cart page displays all the courses added to their add to cart.
Sign Up page

Figure 5. LearnDesk frontend sign up page
LearnDesk sign up page help us to create new users of the system. The user can be a learner or an instructor or affiliator or others design by the system admin.
Login page

Figure 6. LearnDesk frontend login page
There are two buttons on the right side of the home page. the first is to log in. The second is to sign up. If a user already has an account, they do not need to sign up again. Users can purchase the course if they have an account.
Flash Sale

Figure 7. LearnDesk frontend flash sale
On the home page are featured flash sale. Users quickly find flash sale courses. System admin has the facilities to show/hide this section.
New courses
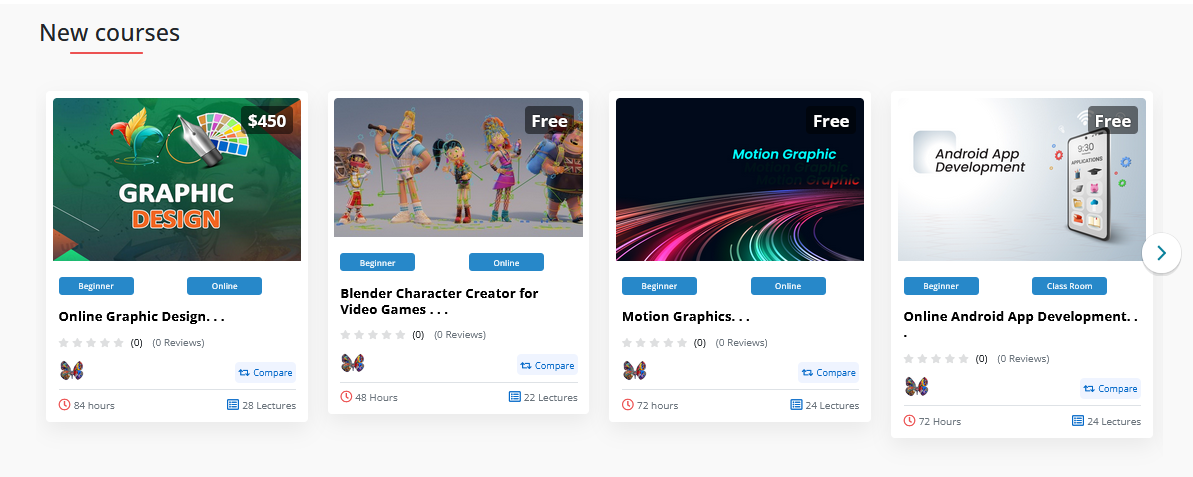
Figure 8. LearnDesk frontend new courses
10 latest courses added in this section. Users can select the most recent courses and purchases by signing up. System admin has the facilities to show/hide this section.
Most Popular courses

Figure 9. LearnDesk frontend most popular courses
10 most popular courses added in this section. Users can select the popular courses and purchases by signing up. System admin has the facilities to show/hide this section.
System summary

Figure 10. LearnDesk frontend at a glance
System summary will be display here. System admin has the facilities to show/hide this section.
Free courses

Figure 11. LearnDesk frontend free courses
All free courses will be display here. System admin has the facilities to show/hide this section.
Course categories

Figure 12. LearnDesk frontend course categories
System admin has the facilities to show/hide this section.
Latest Blog

Figure 13. LearnDesk frontend latest blog
System admin has the facilities to show/hide this section.
Latest eBook

Figure 14. LearnDesk frontend latest eBook
System admin has the facilities to show/hide this section.
Course filter

Figure 15. LearnDesk frontend course filter
Users can filter Categories, Price, Level, Language before signing up to LearnDesk and purchasing courses.

Figure 16. LearnDesk frontend sort courses
Filtering facilities will be done without page refresh.
Course details page

Figure 17. LearnDesk frontend course details
A user can view the course details page. Course ratings, curriculum, course requirements, course description, course previews, and can learn about the instructor without signing up.
Course compare

Figure 18. LearnDesk frontend course compare
Compare a course with others. The system users or visitors can compare courses without login the system.
About us
You can find teh about us menu in footer area. There is a sction called Help, and under help you will find the about us page

Figure 19. LearnDesk frontend about us
The user can learn about the LearnDesk application without signing up by visiting the 'about page' in the menu below.
Affiliate program

Figure 20. LearnDesk frontend affiliate program
The user can learn about the LearnDesk application without signing up by visiting the 'about page' in the menu below. You can also find 'Terms and Condition','Privacy policy', and 'Refund Policy'
eBook filter

Figure 21. LearnDesk frontend eBook filter
Users can filter Categories, Price, Language before signing up to LearnDesk and purchasing eBook.
eBook details

Figure 22. LearnDesk frontend eBook details
A user can view the eBook preview page, summary, specification, author, and can buy the eBook here.
Tuition filter

Figure 23. LearnDesk frontend tuition filter
Users can filter Categories, class type, price type, tuition type and language before signing up to LearnDesk and purchasing tuition. Please note that for purchase you have to logged in the system
Course bundles
Bundles of online courses to learn from anywhere, with courses for creatives taught by leading professionals from around the world. At LearnDesk you can easily find the course bundles from the category or at home page.

Figure 24. LearnDesk course bundles
Once click the course bundle name a page with details information will be opened. Learner can purchase courses as course bundle.

Installation
                                    Unzip and copy the script folder in your hosting server.
                                    Make sure in script folder index.php and .htaccess file have permission as 644
                                    Make sure in script folder uploads
                                    Manually create a database in “Phpmyadmin”.
                                    Run the install script path from any web browser (http://server.com/installation/).
                                    Provide necessary information for Setup Database, Organization, Branch, Admin User.
                                    After filling up all input fields, setup will be completed.

                                    Good Luck!!!
Web browser -> http://server.com/installation/ -> Go
Step 1: Database Setup

Step 2: Setup Organization

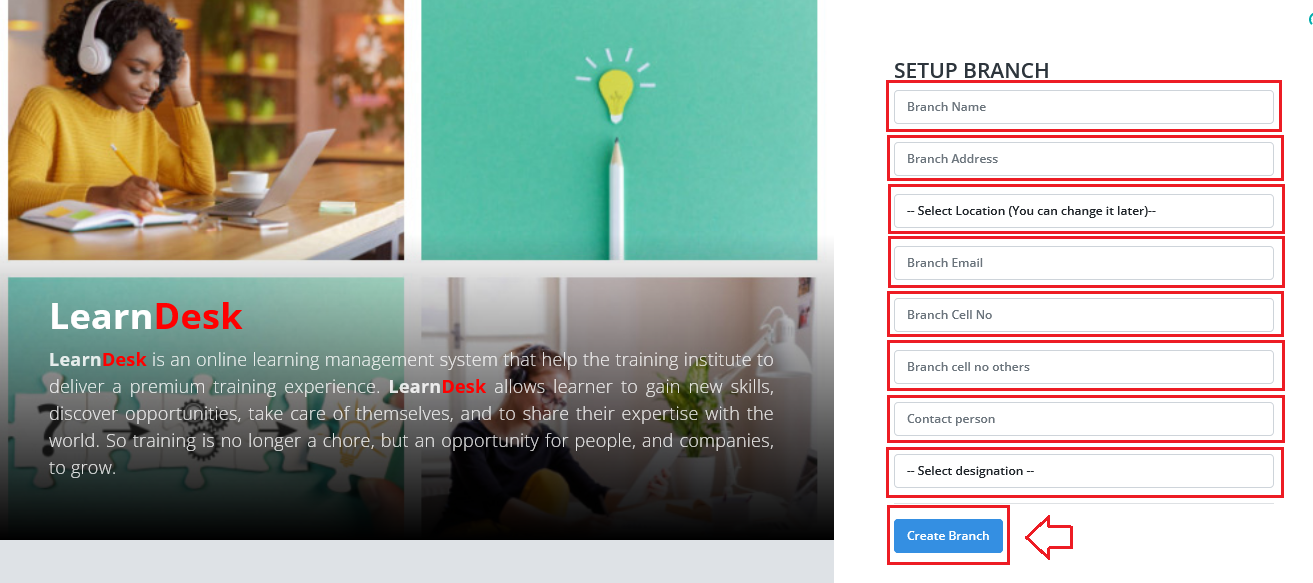
Step 3: Setup Branch
Step 4: Setup Admin

Good Luck!!!!!
WE ARE READY TO HOSTING THE ENTIRE PROCESS FREE OF COST. CONTACT us through gmail alam5664@gmail.com
How to Start
From the very begining Admin user should create the basic control of the system. To do so click login button from top right and logged in the system. After successfully Logged in Admin user click the name on the top right corner and access the control panel of the site. Here you will find all the possible menu of the system. The control panel looks like below.
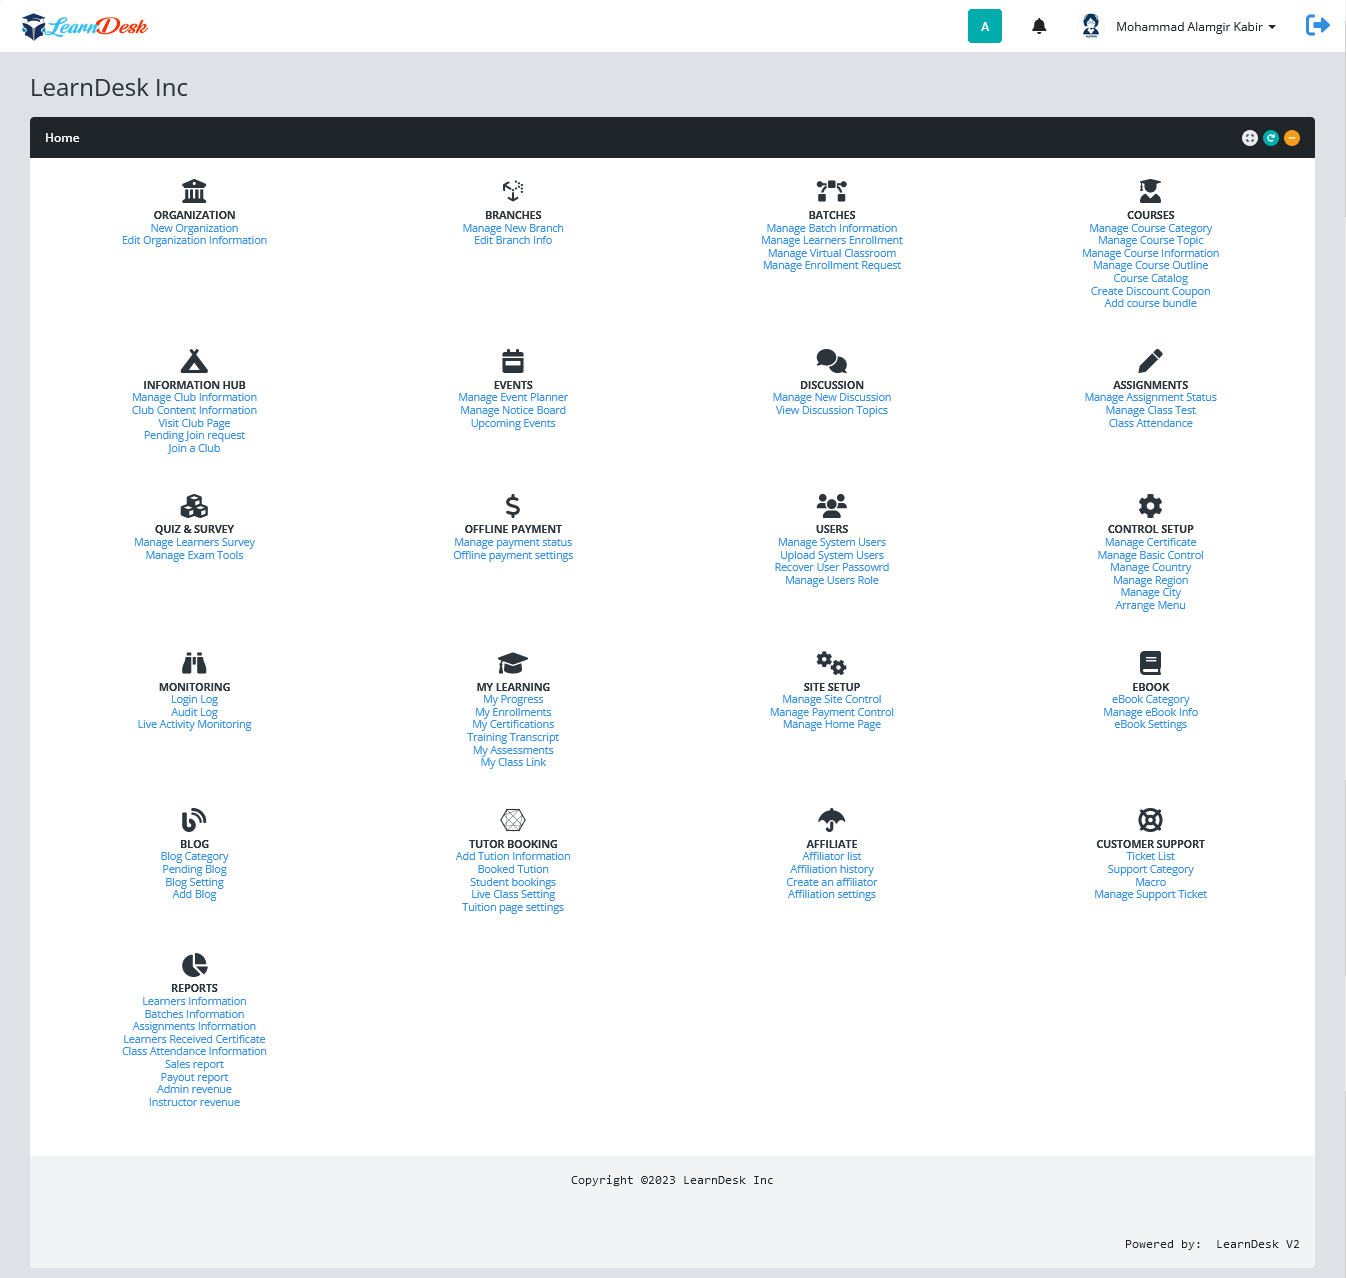
Figure 25. Control Panel
Details of Control Panel
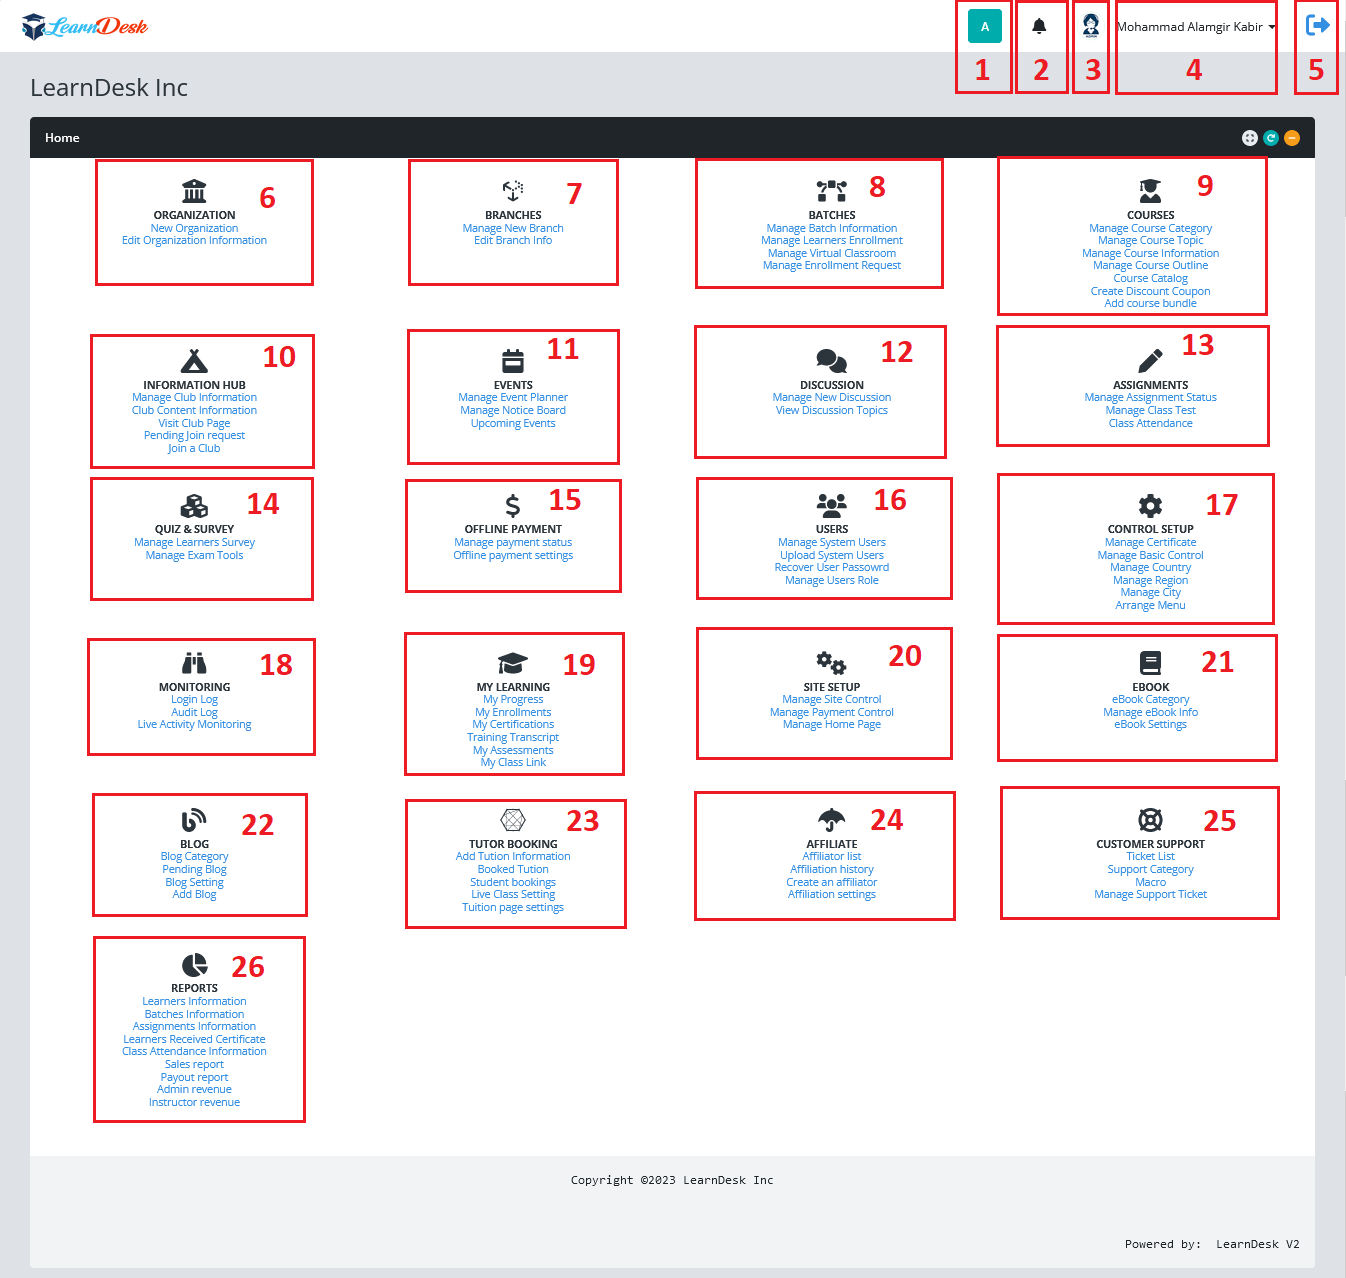
Figure 26. Control Panel Details
1: Type of user
LearnDesk work basically with 3 types of users. They are Adminstrator, Mentors and Learner. Here A Indicate that the user has the role as Administrator. If it indicate M then the user has the role as Mentors and if it indicate L then the user has the role as learner. The system administrator choose the user type when he/she is going to create the system user. However, if the administrator or the user who has the rights and privileged to work on basic control can create other type of user as he/she need based on institute/organization demand. Once click the icon the system will bring you the frontend of the site.
2: Notification
If the logged use has any notification, the Learndesk system shown # of new or unread notification he/she has now. LearnDesk Notification system is just look like the email system. We will cover this later
3: Profile Picture
User profile picture shown here. By default, the picture will be blank. Each user of LearnDesk system has the default option to change his/her profile picture. We will discuss it later.
4: Profile Menu
User name will be display here. This point, each user has a common drop down menu. Using this menu the user will be able to change the profile related information, profile picture, branch information and so on which will be discussed later
5. Log out
By pressing this icon the user able to log out from the system.
6: Institute Information
Here the privileged user is able to change the organization information. In each purchase, LearnDesk allow only one institute/organization. You can manage multiple branches at a time, but you can't work more than one organization at a single platform.
7: Branch Information
You can create as much branch as you need. You can also edit branch information too.
8: Batch Information
You can craete as much batch as you want and also edit the batch information if needed. You can also enroll learners into batch, Setup virtual class room, also manage enrollment request by the learners.
9: Course Information
In LearnDesk you can create as much course as you want. Here you can also create course outline using 12 different type of content. You can also generate course catalog here.
10: Information Hub
Beside course, LearnDesk system allow to provide more learning information, by creating different information club. create the club content, join learners into the club and so one.
11: Events
Each organization, manage different types of event around the year. LearnDesk allow and give a place where the institute create different events and generate notices as and when require for its administrative purpose or for learners. the "Noticeboard" enhances the feature of providing notice or any information to the students. By using this feature, an admin or the instructors can send any urgent announcement or any notification. You can send this notice to the course playing page or the learner's email address.
12: Discussion Forum
LearnDesk allow the users to create and manage discussion. This enhances the facility to make a discussion between the course instructor and learners. Enrolled learners can publish a question, and it will become visible to the course instructor and other fellow students. They can make the solution of their problem by discussing it. Any user can participants on any topics and give his feedback.
13: Assignment
The assignment feature for your learners with LearnDesk, you can provide assignments to your learners to make the course more effective. You can also manage the course test using this menu. This menu is specially assign for mentors of the system.
14: Quiz and Survey
This part only manage by the Mentor and the Administrator. Using this part, the user create survey and quiz easily. We will discuss this part later
15: Offline Payment
"Offline payment" provides offline, cash or local payment gateway features to the learners while purchasing a new course. This gives a payment document upload option during the payment process. After that, the admin can verify the transaction and approve the payment from the backend. Using this you can sell courses to the students by any medium. This part only manage by the Administrator. We will discuss this part later.
16: Users
Using this part, LearnDesk user can create different types of user, recover user password and assign roles and privileges of the system.
17: Control Setup
This is very userful part. using this part the user create different types of control that can use into the whole system. The Control like online certificate setup, basic control, like designation, course type, course category, city, country, region etc. We will discussion this part later.
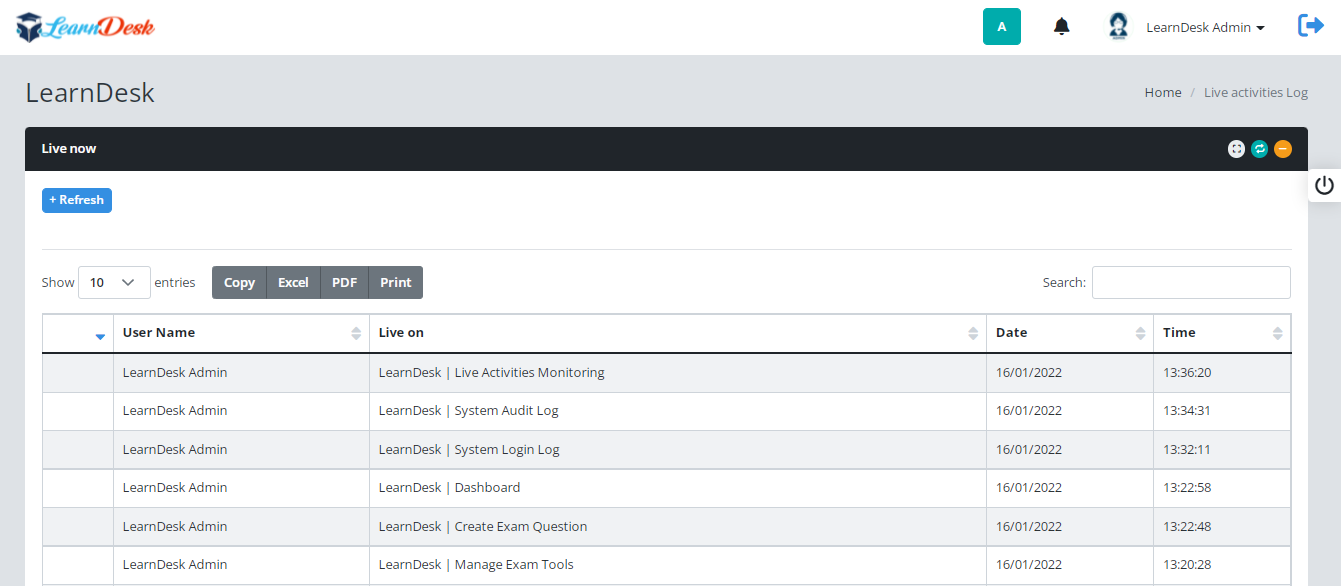
18: Monitoring
Security is the prime objective during building LearnDesk. The system has the built-in option to track each and every activities of the system. This part help you to learn the login status, perform system audit and alos live monitoring of the users activities. We will discuss detail later
19: My Learning
Manage and generate learners related information. This menu is belong to the learners.
20: Site Setup
This is very userful part. Using this part the administrator of the system can manage the site. This menu is only belong to the admin. Manage different pages, payment information and others activities will be done using this menu.
21: eBook
Enhance the features of adding online books for your learners with the Ebook Addon. Here you can add, edit, manage and delete books from your site. Also, your learners can purchase and enrich their knowledge by reading ebooks from anywhere, anytime. We will discussed this in later part.
22: Blog
Publish your blogs with LearnDesk. You can also manage blog settings as an admin. You can give permission or pending your instructor's blog on your application. We will discuss this in later part.
23: Tuition Booking
Using the Tuition booking in LearnDesk, your learners can choose instructors for different classes. Your learners can book your instructors for classes. Instructors can conduct their classes according to their regularly scheduled class timetable. Your learners have to pay for booking their instructors. As an admin, you can earn the commission if your learners pay for booking instructors through your application. We will discussed this in later part.
24: Affiliate
Affiliate marketing is a method of earning money by promoting a company's products or services for sales purposes. An affiliator can earn commissions every time by selling the company's products or services. It sounds like a commission-only sales representative. We will discuss this part later.
25: Customer Support
"Customer support" enhances the feature to provide professional supports to your users. Anyone can send the support ticket concerning any issue about the application.
26: Reports
Different tpe of report will be generated here.
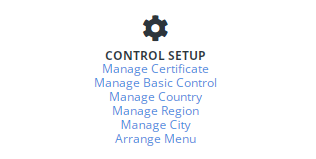
Control Setup
Before working any other part of the system, as Administrator of the system, first you must need to complete "Control Setup". In this section, you can manage certificate, basic control, country, region and city. With the help of this section, you can also rearrange the menu item of the system too. LearnDesk gives the best user experience in manage those things.

Figure 27. Control Panel Details
1.1 Manage Certificate
By default, one certificate was set (Marked with tick) activc. You can choose any of the certificate. You can active others by click the Make default text. Please follow below steps :
                                Login as admin
                                Select Manage Certificate under Control Setup
                                Click 'Make default' and select the template of the certificate.
                                For new put certificate name, select the browse button and choose the certificate file.
                                Then Click Create Certificate Button

Figure 28. Manage Certificate
1.2 Manage Basic Control
This is the most essential section to setup the controls. Actually LearnDesk system operates successfully based on some field values. The administrator of the system, can setup those field value. The field value like, designation, event mode, user type etc. So LearnDesk allow you to give all control into your fingertips. Below is given setp by step instruction how to create control.
                                Login as admin
                                Select Manage Basic Control under Control Setup
                                Click on the item which you want to change.
                                A new window open with necessary information to create new value for the perticular items.
                                You can also edit the item value just click the item name and change the value.
                                Thats it
Below is given setp by step instruction how to create control
Step 1: To do so click on "Manage Basic Control".
Step 2: LearnDesk need 22 different types of controls to run system successfully. While you click on "Manage Basic Control" a window will open where you will find all the 22 different types on controls. You need to add control based on your requirement.

Step 3: If you want to add for any controls click on that control. For example, if you want to add designation, click on the designation. LearnDesk system open a window to receive a values for designation from the administrator.
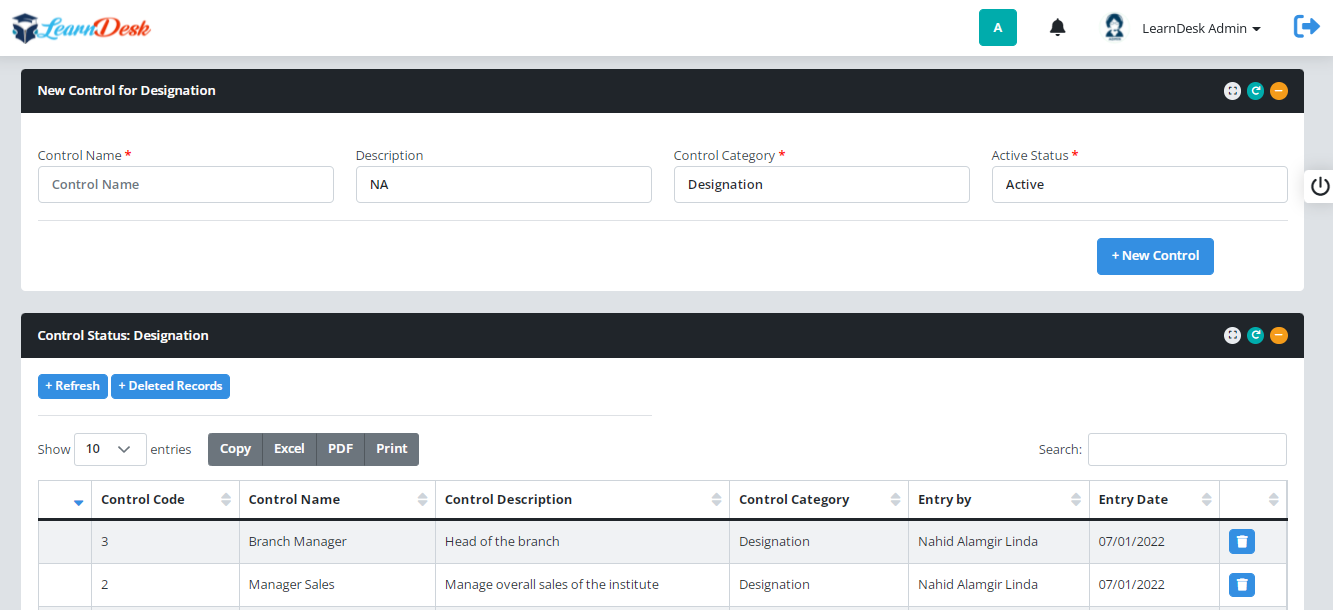
Step 4: For example, if you want to add designation "Finance Director" enter Finance Director into control name. You can put description if any or leave it as NA, Select active status "Active" and press "New Control" button. In this way you can add others. A system message will be generated to confirm that the control created successfully.

1.3 Manage Country
You can add contry information into LearnDesk. Below is given setp by step instruction how to add Country information into Learndesk
Step 1: To do so click on "Manage Country".
Step 2: Learndesk open a window where you easily add country information. Give Country Name, enter nationality, Suffixes and country code into the add fields. Press "New Record" button to create the country. A system message populated to confirm the country is successfully created.

Step 3: You can view the available country information in the same window under Country Information Panel. You can delete the country information Just press the delete button at the begining of record.

1.4 Manage Region
Once you added the country information, system permit you to create region information. You can add region information into LearnDesk. Below is given step by step instruction how to add Region information into Learndesk
Step 1: To do so click on "Manage Region".
Step 2: Learndesk open a window where you easily add region information. Select country name from the list, Region Name, Region Code, Latitude and Longitude into fields. Press "New Record" button to create the Region. A system message populated to confirm the Region is successfully created.

Step 3: You can view the available Region information in the same window under Region Information Panel. You can delete the region information just press the delete button at the end of record.

1.5 Manage City
After added the Region information, system permit you to create city information. You can add city information into LearnDesk easily. Below is given step by step instruction how to add city information into Learndesk
Step 1: To do so click on "Manage CITY".
Step 2: Learndesk open a window where you easily add city information. Select country and Region name from the list, put City Name, City Code, Latitude and Longitude into fields. Press "New Record" button to create the City. A system message populated to confirm the City is successfully created.

Step 3: You can view the available City information in the same window under City Information Panel. You can delete the City information just press the delete button at the end of record.

1.6 Arrange Menu
You can rearrange menu very easily by using drag and arragnge facilities. Below is given step by step instruction how to rearrange menu into Learndesk
Step 1: To do so click on "Arrange Menu".
Step 2: A list will display with the default menu arrange patern.

Step 3: Drug the menu name up and down to arrange the menu.

NOW YOU CAN SETUP OTHER PARTS
Profile Menu

This is the common menu for any types of user. In this section, you can manage User Profile, Change Password, Create User Folder, Upload Files into folder, View uploaded Files, Share folder with Mentors or Classmate. LearnDesk gives the best user experience in manage those things. Below are given step by step description how to work on it.
MY PROFILE
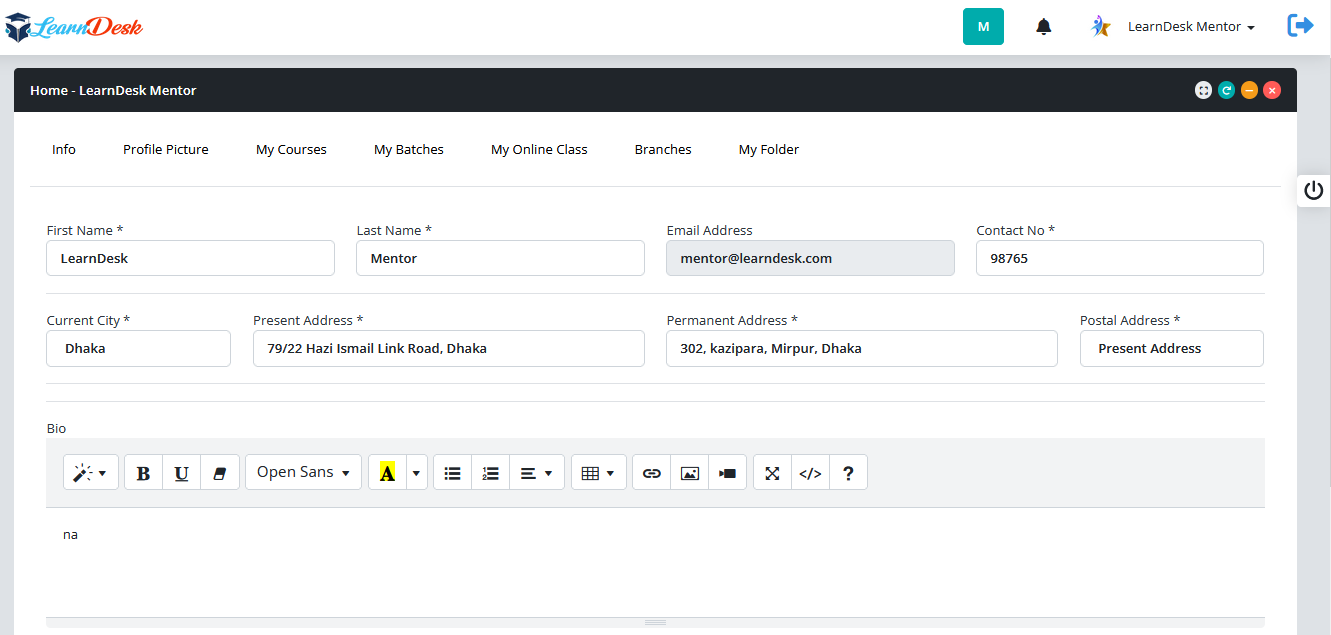
LearnDesk user can update their profile related information using this menu. Information like branch name, first name, last name, cell phone, type of user, Current location, present address, permanent address, select postal address and join date, password and short bio. But he can't able to change the email address.
Profile for Administrator

Profile for Mentors and Learners
If you carefully look at the above two picture you will see some differences. Administrator can perform 4 types of operation here, Info, profile Picture, Branches and My Folder.
But mentors and learners can perform additional types of operation like my course, my batches, my online class etc.
By default after click My Profile the "Info" information will be display which will allow the users to change their basic information.
INFO
Change information related to profile and effect that changes by pressing "Update Now" Button.
PROFILE PICTURE
System user can change their profile picture here.

Step 1: Click on the "Profile Picture"
Step 2: Click "Change Picture"
Step 3: A window open with option name "Select your Picture"

Step 4: Click "Choose File" button from Select Your Picture window, select files and press "Upload" button to chage the picture.
Picture will be changed immediately.
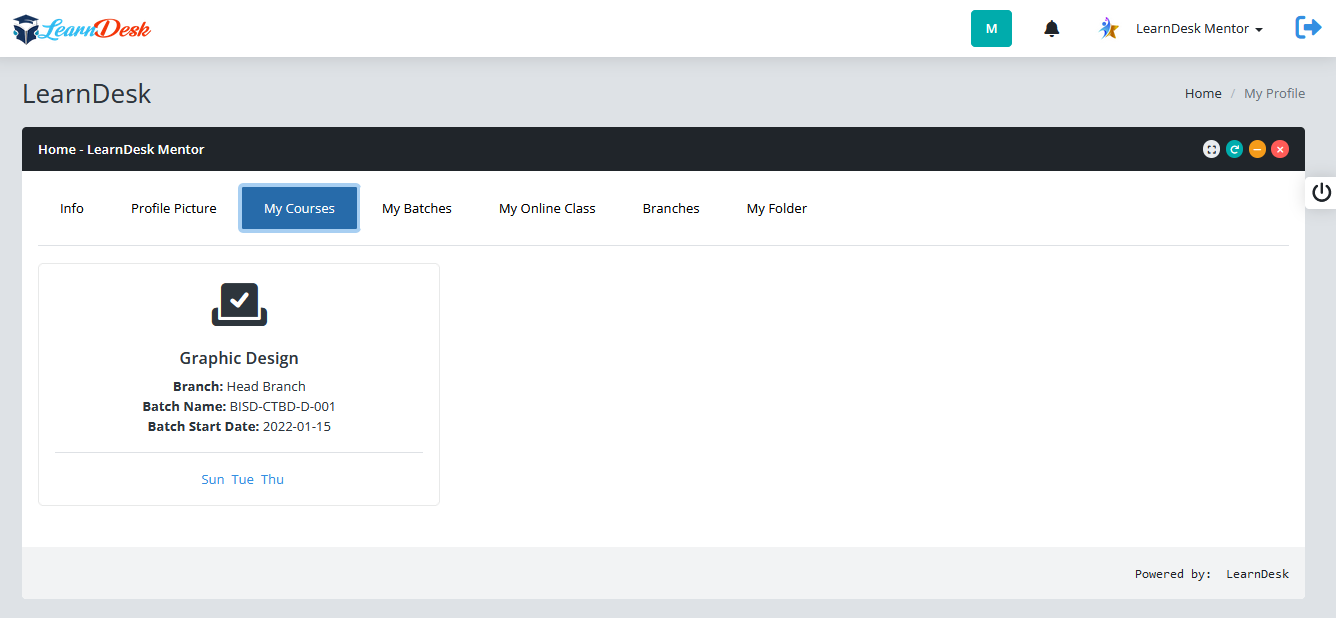
MY COURSES
This part is applicable only for Mentors and Learners. But there are some differences.
For mentors, system shown the running courses where the mentor taking classes.Below are shown the Mentors workspace
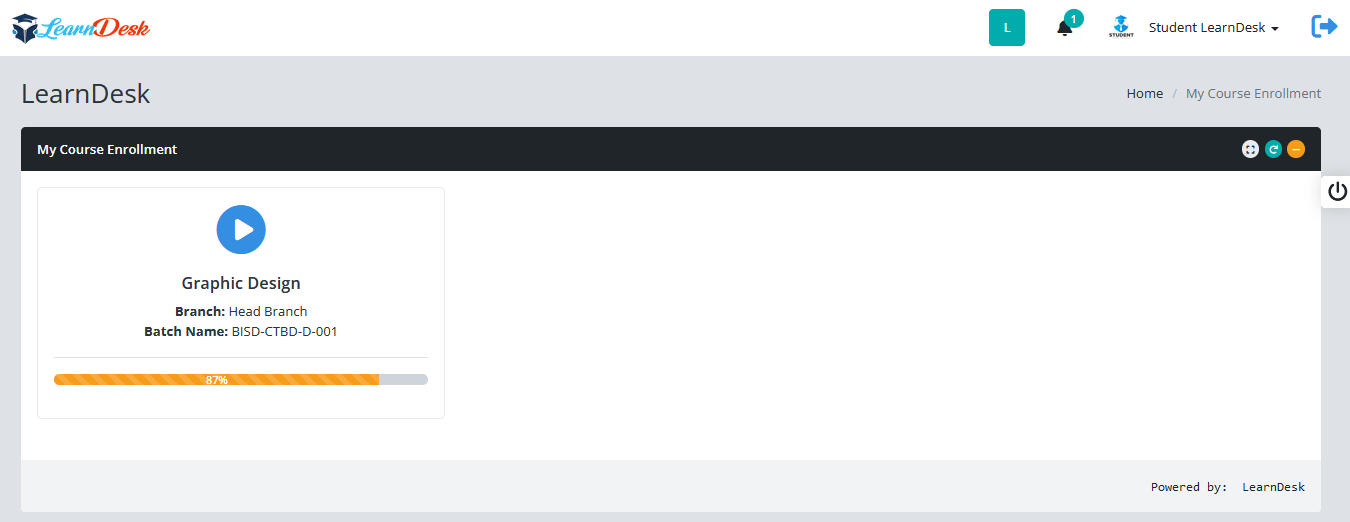
For learners, system shown the courses where learner is learning. In Learners panel, the system also shown the completion rate by %. Here the learner has the option to complete another class lesson by pressing the Play button. Below are shown the Learners workspace

MY BATCHES
This section is applicable only for Mentors and Learners. LearnDesk system shown the running batches where the mentor/learner enrolled as mentor/learner.

MY ONLINE CLASS
This section is applicable for Mentors and Learners. When any batch is started the Mentor or the Admin assign and add every details of the batch like Class Link, Link where recorded video store and the Group that created for this batch. So the mentor or the learners can easily jon the onine class by clicking the link icon mention in below:

BRANCH
In this section, the branch name will be displayed that the user enroll with Learndesk:

MY FOLDER
Display users folder created by LearnDesk system or by user:

HOW TO CHANGE PASSWORD
Below are describe step by step process how to change password
- Step 1: Click Change Password under profile menu
- Step 2: Enter New password and confirm password
- Step 3: Click Change Password button for change password

Change Password

A system generated message will be displayed to comfirm you that the user password change
HOW TO CREATE FOLDER
Below are describe step by step process how to create folder
- Step 1: Click Create Folder under profile menu
- Step 2: Enter folder name
- Step 3: Click New Folder button to Create Folder
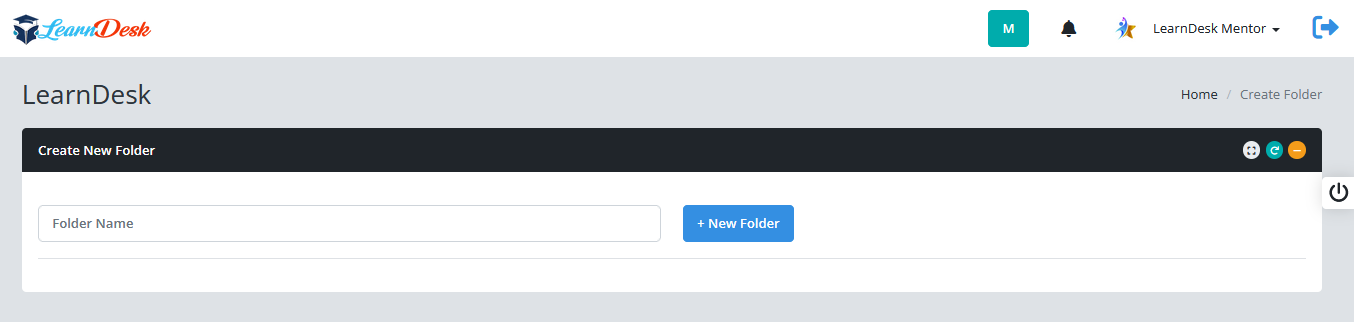
A system generated message will be displayed to comfirm you that the user Folder created successfully
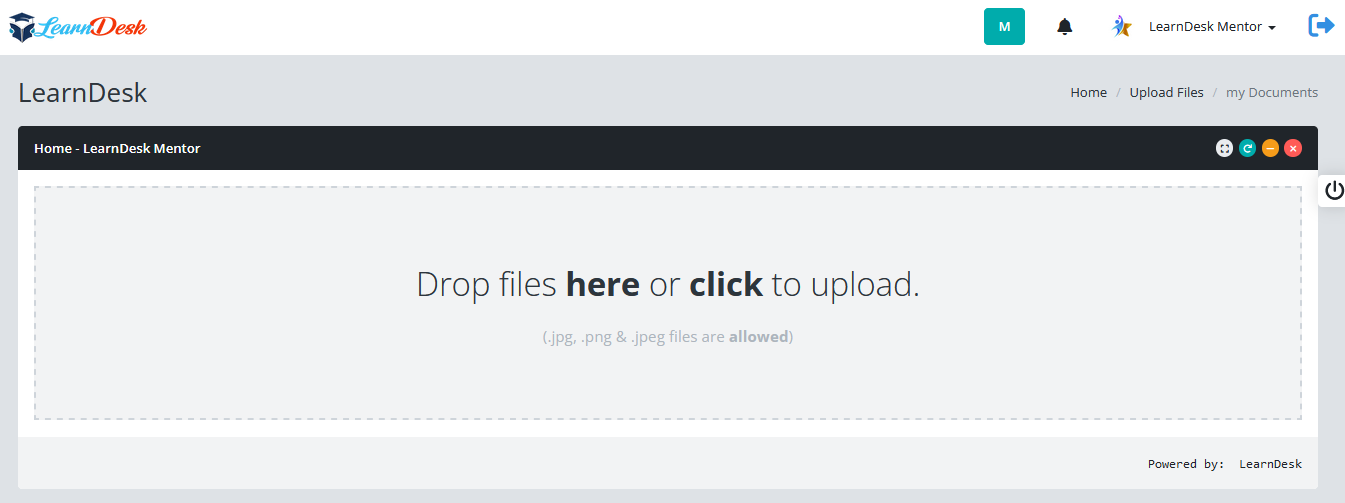
HOW TO UPLOAD FILES INTO A FOLDER
Below are describe step by step process how to files into a folder
- Step 1: Click Upload Files under profile menu
- Step 2: Click folder into which you want to upload files
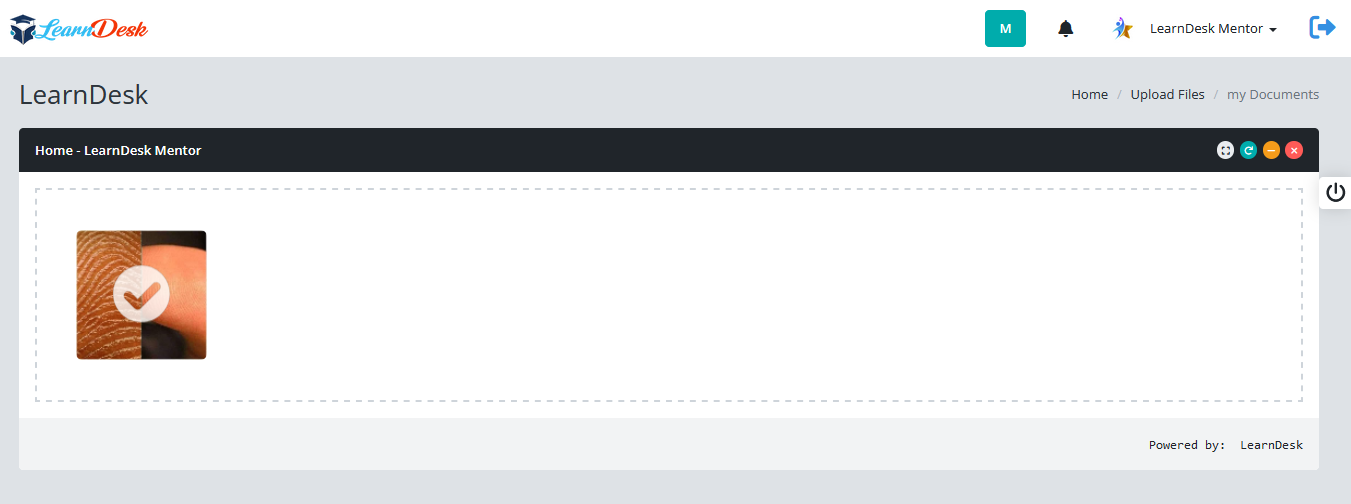
- Step 3: A window open with image upload area. Click or drug files into the folder one by another
- Step 4: Wait when the tick mark appear on the image

HOW TO SHARE A FOLDER WITH OTHERS
The Learners share their folder with mentors or with his/het batch mate. Below are describe step by step process how to share a folder with others.
- Step 1: Click Share Folder under profile menu
- Step 2: A window open with necessary information.
- Step 3: Select the Batch name
- Step 4: Upon selection of the batch the user able to select the user name (Learners or mentor)
- Step 5: Select the Folder name which you want to share
- Step 6: Select a date to set the duration of sharing
- Step 7: Click Share Now to share the selected folder


A system message displayed to confirm the user that the folder is shared. and the details will be displayed with folder name and duration in "Share Folder Status Area". You can download, copy or print the share status by pressing the "Action Button"
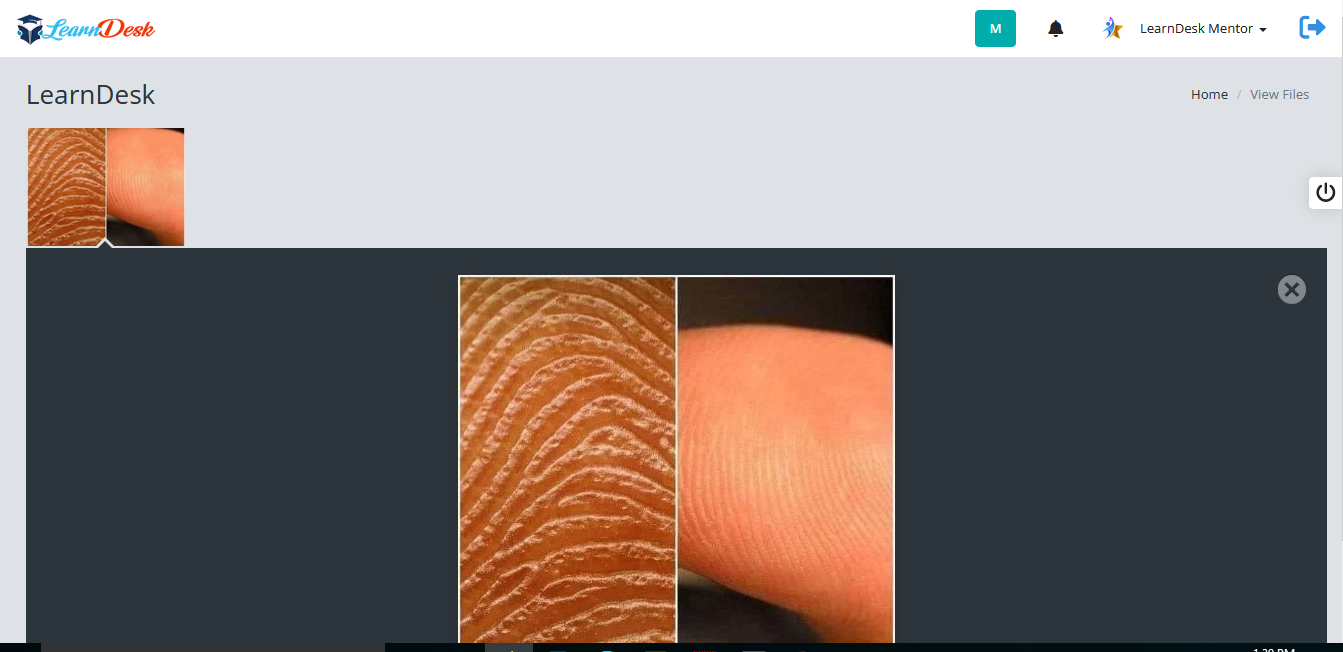
HOW TO VIEW FILES
The users of LearnDesk system can view their uploaded files anytime. Below are describe step by step process how to view files.
- Step 1: Click View Files under profile menu
- Step 2: Click the folder to view files.
- Step 3: A window open with files
- Step 4: Click the files to display

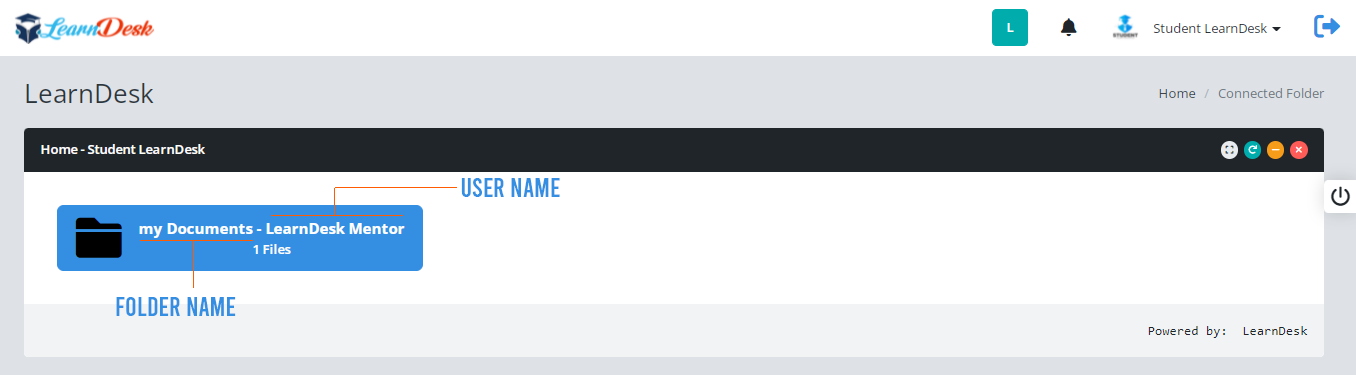
HOW TO VIEW SHARE FOLDERS WITH ME
The user of LearnDesk can view shared folder files that is shared with him/her. Below are describe step by step process how to view Folders and files.
- Step 1: Click "Connected Folder" under profile menu
- Step 2: A window open with shared folder and shared by user. Click the folder to view files.
- Step 3: A window open with files
- Step 4: Click the files to display
Notification
Instant messaging systems can be very useful. It allows immediate and convenient communication between Learners to mentor, Mentor to Learners, Admin to learners and Learners to Admin. Messaging system in LearnDesk is just like email system. Below are given a step by step instruction how LearnDesk notification system works.
Click the Notification icon (bell icon) at the top right side of page. Click the message box. A window will be open with relevant informaton


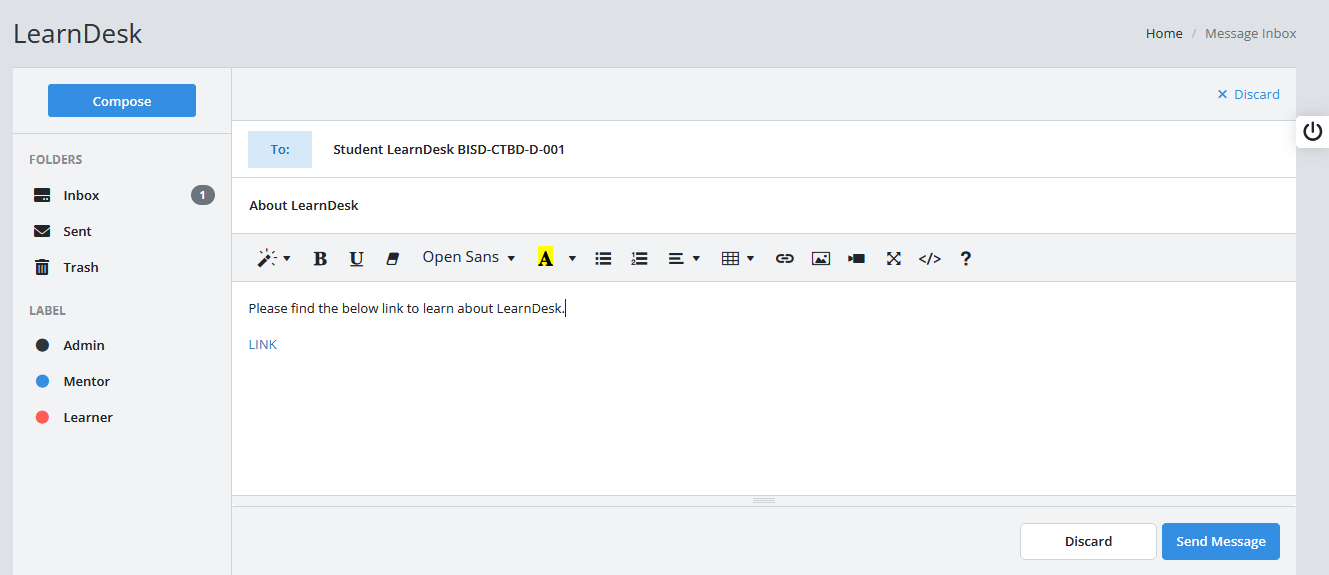
SEND MESSAGE MANUALLY
You can send message manually at any time. It can be Learners to learners, Learners to Mentor, or mentor to learner. The system admin can send message a group of system users or entire users of the system.
Click Notification Bell Icon -> Message Box -> Press Compose

Message To: Select the Learners or Mentor from the list
Subject: Enter a subject for this message
Body: Enter message details and press Send Message
Received Message

LearnDesk Institute
Every purchase of LearnDesk comes with a single Institute license. That means you can create only single institute information. When you browse the system 1st time, the system automatically connects you to the institute setup page. You have to provide some basic information like institute name, name of the chief executive, designation of the chief executive, address, location, primary phone no, cell no, email address, and website information. So you have only edit the organization information as you create it before.
below is given step by step instruction how to edit Institute information
Step 1: Click "Edit Institute Information" under Institute section.

Step 2: LearnDesk system open a window with information of the institute that created during registration phase.

Step 3: Change the relevant information and press "Edit Institute button to edit the institute information. A system message populated with the confirm message
Branches
You can create as many branch as you want and manage those efficently in single platform. Through LearnDesk you can create branch and edit the branch information if needed. Below is give step by step information how to create and edit branch information.
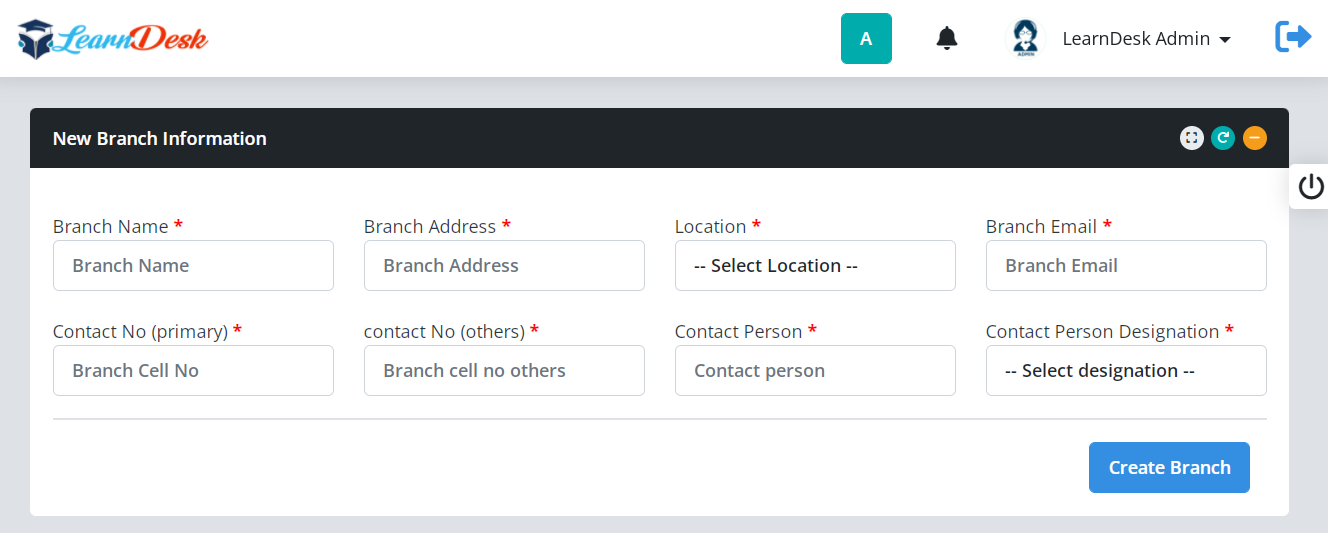
CREATE NEW BRANCH
Step 1: Click "Manage New Branch" under branch section

Step 2: LearnDesk system open a window where you can add necessary information to create a new branch. Enter your branch name, branch address, branch location, branch email, branch contact no, contact person information, and contact person designation. When enter all field information, press "Create Branch" button to create the branch. A system message is generated to confirm user that the branch is created successfully.
Step 3: You can also view your create branch information under Available Branches panel. You can delete branch information just press the delete icon at the end of record. You can copy, print and download branch list by pressing the action button.

EDIT BRANCH INFORMATION
Step 1: Click "Edit Branch Info" under branch section
Step 2: Learndesk system open a window with available branch information. Click the Edit Icon to edit the branch.
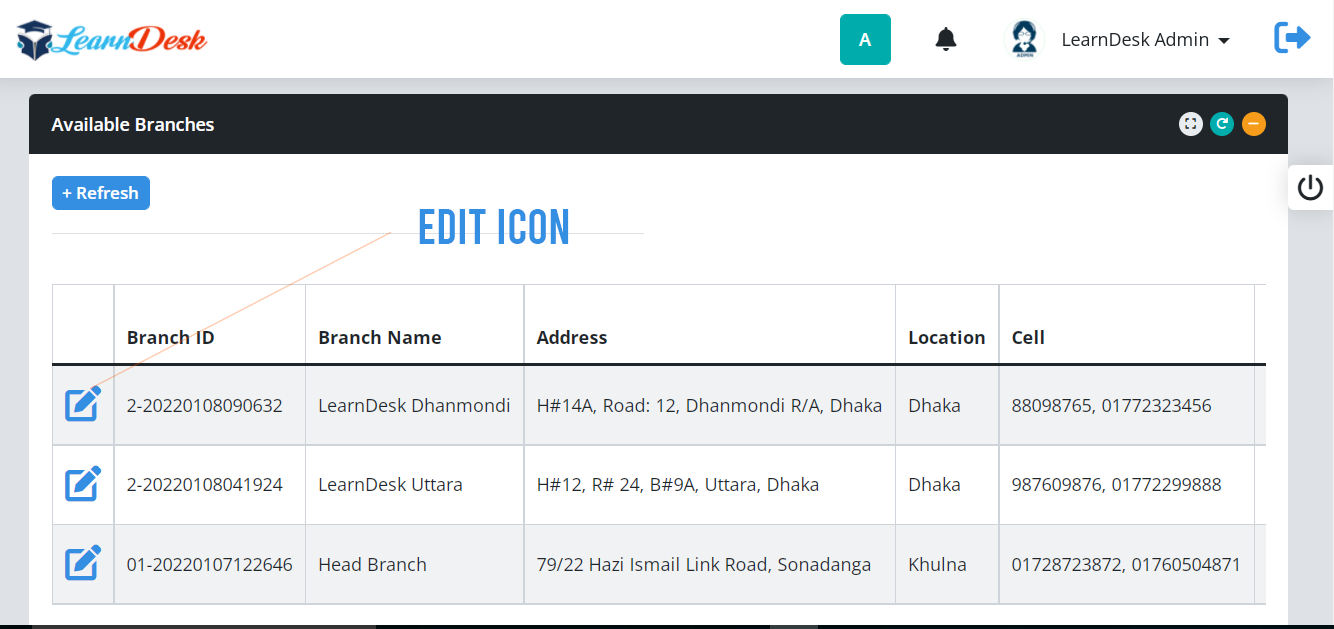
Step 3: Once click the Edit Icon LearnDesk one a window with information of that branch. Update necessary information and press Update "Branch button" to upate the record. A system generate message will be displayed to inform the user that branch information successfully updated and redirect you to the edit window.

Batches
You can create batches easily using LearnDesk. LearnDesk has a sction name Batches. In this section, Administrator or Mentors can manage batch, enroll learners into batches, virtual class room, and manage enroll request by the learners. LearnDesk gives the best user experience in manage those things. Below are given step by step instruction how to use Batches section
Create batch
Step 1: To create batch information click "Manage Batch Information" from the Batches Section

Step 2: LearnDesk system open a window where you can enter necessary information to create a new batch. Select course name, branch name from the list, enter batch name, Batch start date, check class day, batch start and end time, select mentor name from the list and batch close date. When enter all field information, press "Create Batch" button to create the batch. A system message is generated to confirm user that the batch is created successfully.

Step 3: You can also view your create batch information under Available Batches panel. You can delete batch information just press the delete icon at the end of record.

Step 4: To edit batch information, just click the edit option at the begining of each record. Mentors or Admin can easily enroll the Learners by clicking the Learners Enrollment icon. You can delete batch information just press the delete icon at the end of record.
LEARNERS ENROLLMENT
Step 1: To enroll learners click "Manage Learners Enrollment" from the Batches Section
Step 2: LearnDesk system open a window with active batch information. You have to choose the batch in which you are going to enroll learners. Click "Go for Enroll" link to enroll learner.

Step 3: Another window open, where you will find a page with 3 tab pages, i.e Enroll Learner, Import and Enroll, Enrolled Learners.
Step 3.1: In Enroll Learner Tab, you will find a list of learners, that added in LearnDesk. To enroll Learner under this batch, click (+) sign at the begining of each record.

Step 3.2: You can also enroll Learners, using excel files. Click "Import and Enroll" tab, download format, entry learners information based on format, save that file as csv format, click "Choose File", select the csv file and press "Process" button to enroll Learners.

Step 3.3: You can view enrolled learners information on click the "Enrolled Learners" tab page. You can delete Learners enrollment by click the delete button at the begining of each record.

CREATE VIRTUAL CLASSROOM
You can create virtual classroom for any batch. LearnDesk has the facilities to create virtual class. Below are given step by step instruction how to create a virtual classroom.
Step 1: Click "Manage Virtual Classroom" under batch section. LearnDesk system open a window where you find the active batch.

Step 2: Click "New" icon. LearnDesk open a window and you have to enter necessary information like Class Link, Class Video Link, and Facebook Group link. Enter all information and press "Classroom Info".

Step 3: Click "Edit" icon. LearnDesk open a window with necessary information like Class Link, Class Video Link, and Facebook Group link. Change required field and press "Update Classroom Info".

Courses
For course related information, you can use "Courses" Section. In this section, you can manage courses, course outline and view course catagory. LearnDesk gives the best user experience in manage those things. Below are given step by step instruction, how to create category, topics, course, course outline, discount coupon and course bundles
COURSE CATEGORY
Step 1: You can create categories for courses just click "Manage Course Category" under Courses Section.

Step 2: LearnDesk open a window with relevant information to create category at LearnDesk evnironment. You have to enter Category Name, Category Icon, and category details. When done, press "Create Category" button to create the category. A system generated message will be generated to confirm successfully created the Category.

Step 3: You can view all the courses under "Available Category Section". The user can easily edit category just clisk the Edit icon at the begining of each record. User also delete the course information just press the Delete button at the end of each record.

Step 4: To edit a category user press the Edit Icon a separate window open with information. You have to change the necessary information and press "Save Category" button to update the course. A system generated message populated to show that course updated successfully and close the window.

Step 5: Press "refresh" button at the top of the "Available Courses" sction to view the effect.

COURSE TOPIC
Step 1: You can create topic for courses just click "Manage Course Topic" under Courses Section.
Step 2: LearnDesk open a window with relevant information to create Topic at LearnDesk evnironment. You have to enter Topic Name, Category, Icon, and Topic details. When done, press "Create Topic" button to create the Topic. A system generated message will be generated to confirm successfully created the Topic.

Step 3: You can view all the topics under "Available Topics Section". The user can easily edit topics just clisk the Edit icon at the begining of each record. User also delete the course information just press the Delete button at the end of each record.

Step 4: To edit a topic user press the Edit Icon a separate window open with information. You have to change the necessary information and press "Save Topic" button to update the topic. A system generated message populated to show that course updated successfully and close the window.

Step 5: Press "refresh" button at the top of the "Available Courses" sction to view the effect.

CREATE COURSE
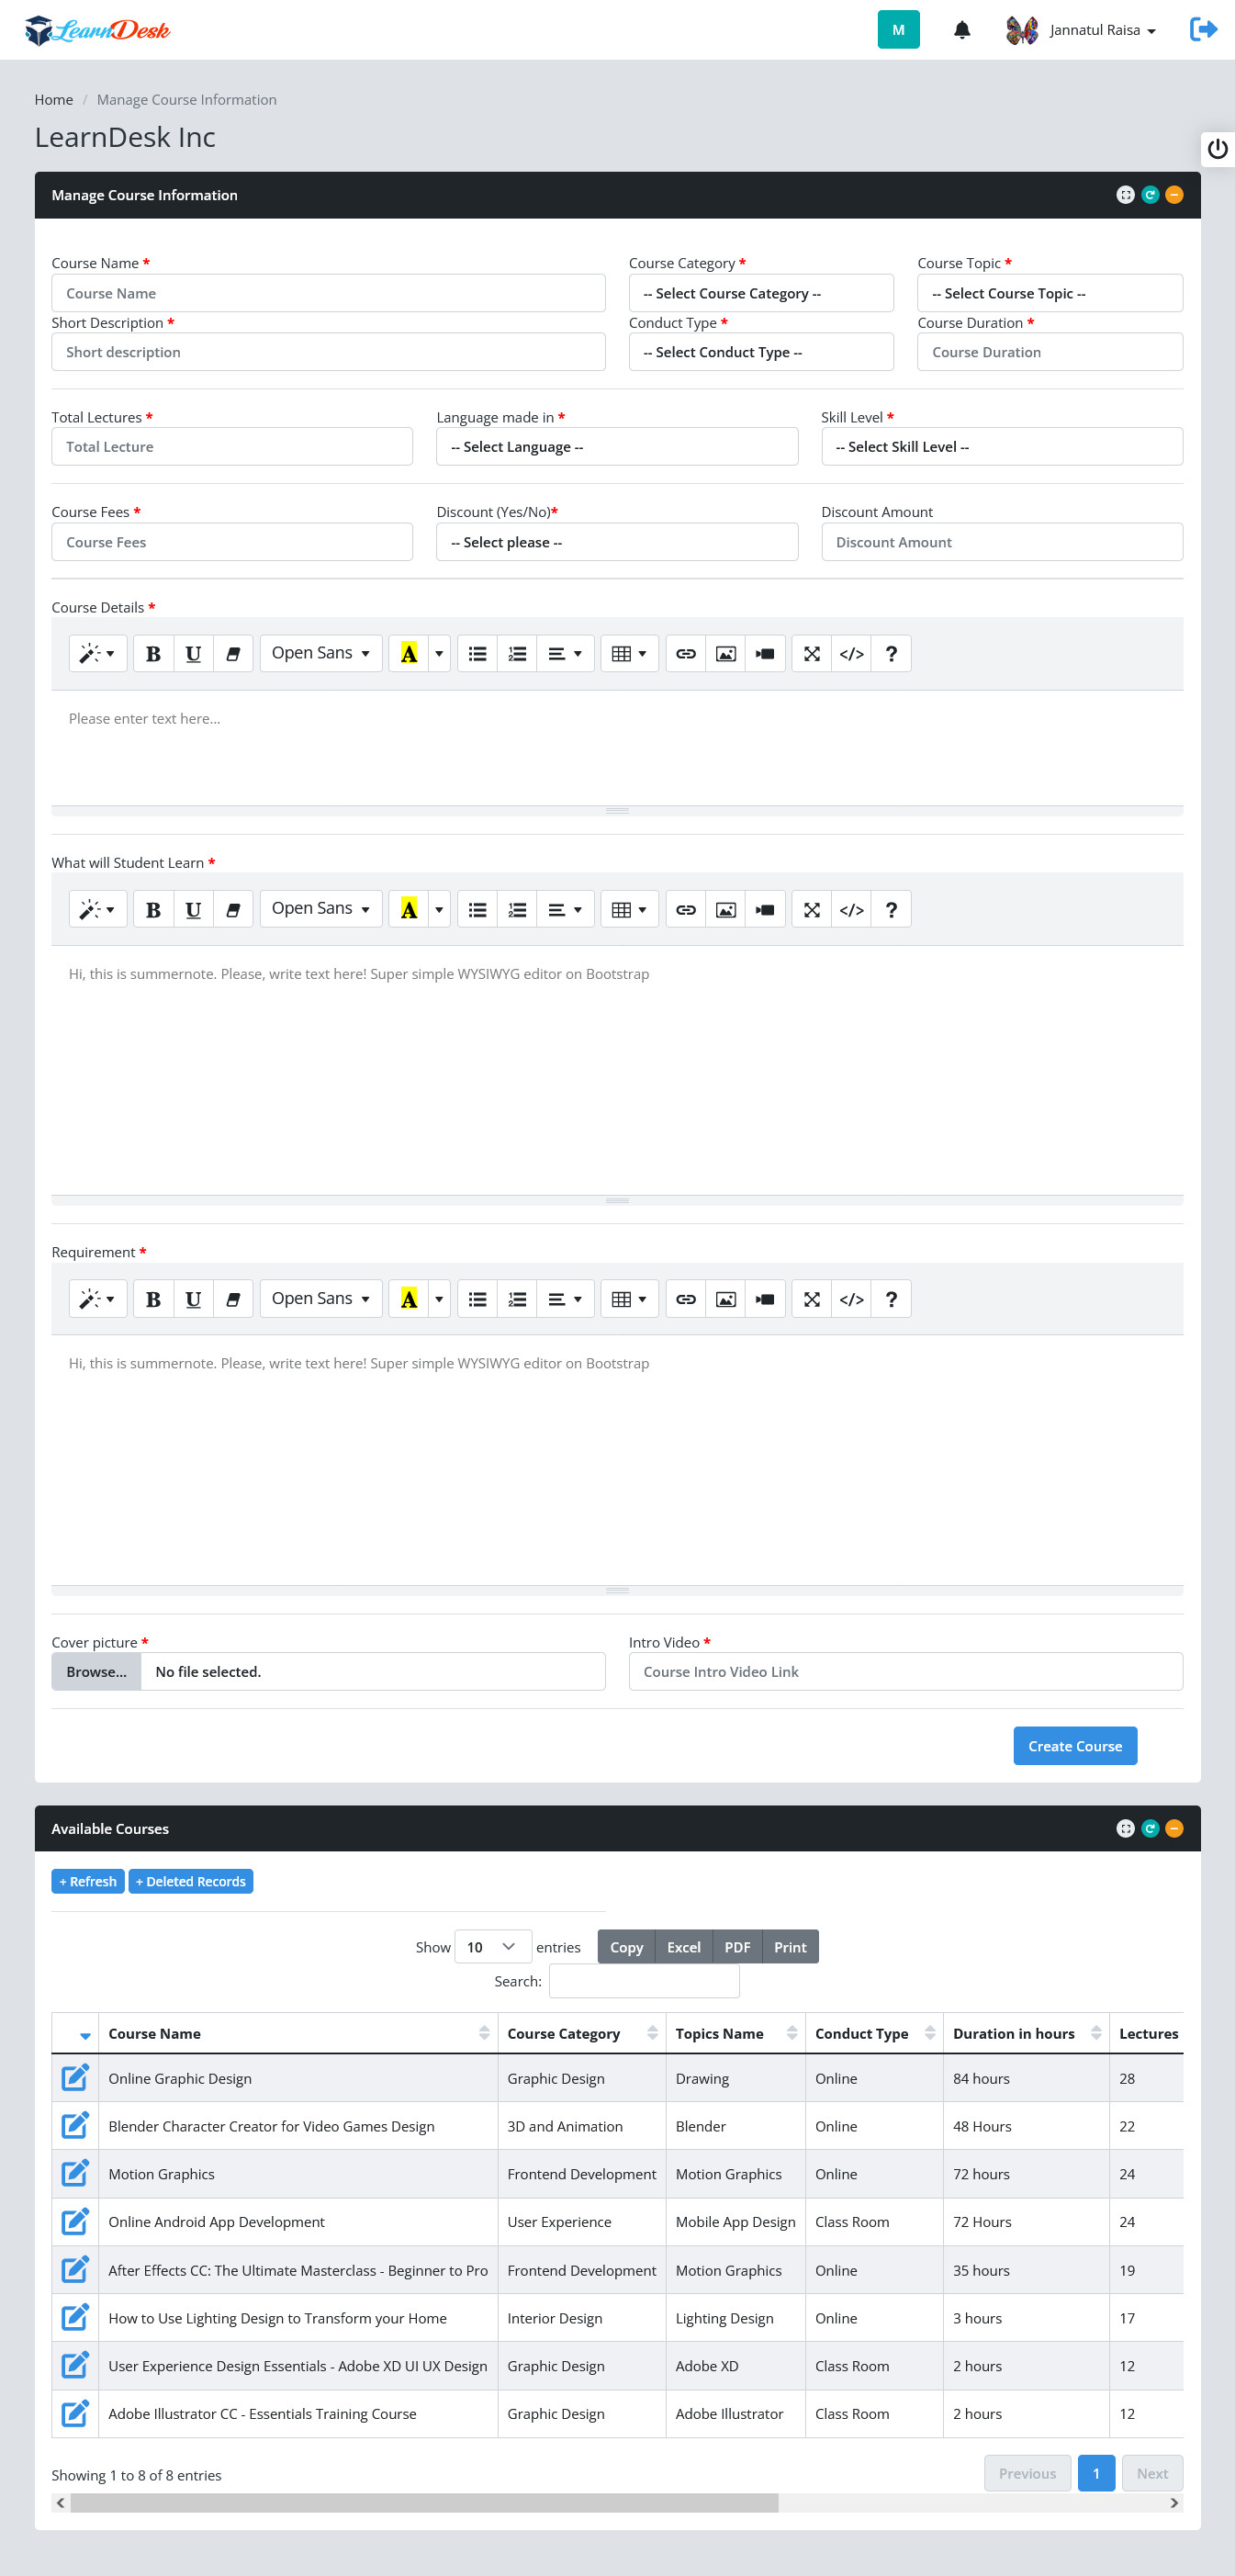
Step 1: You can create new course just click "Manage Course Information" under Courses Section.
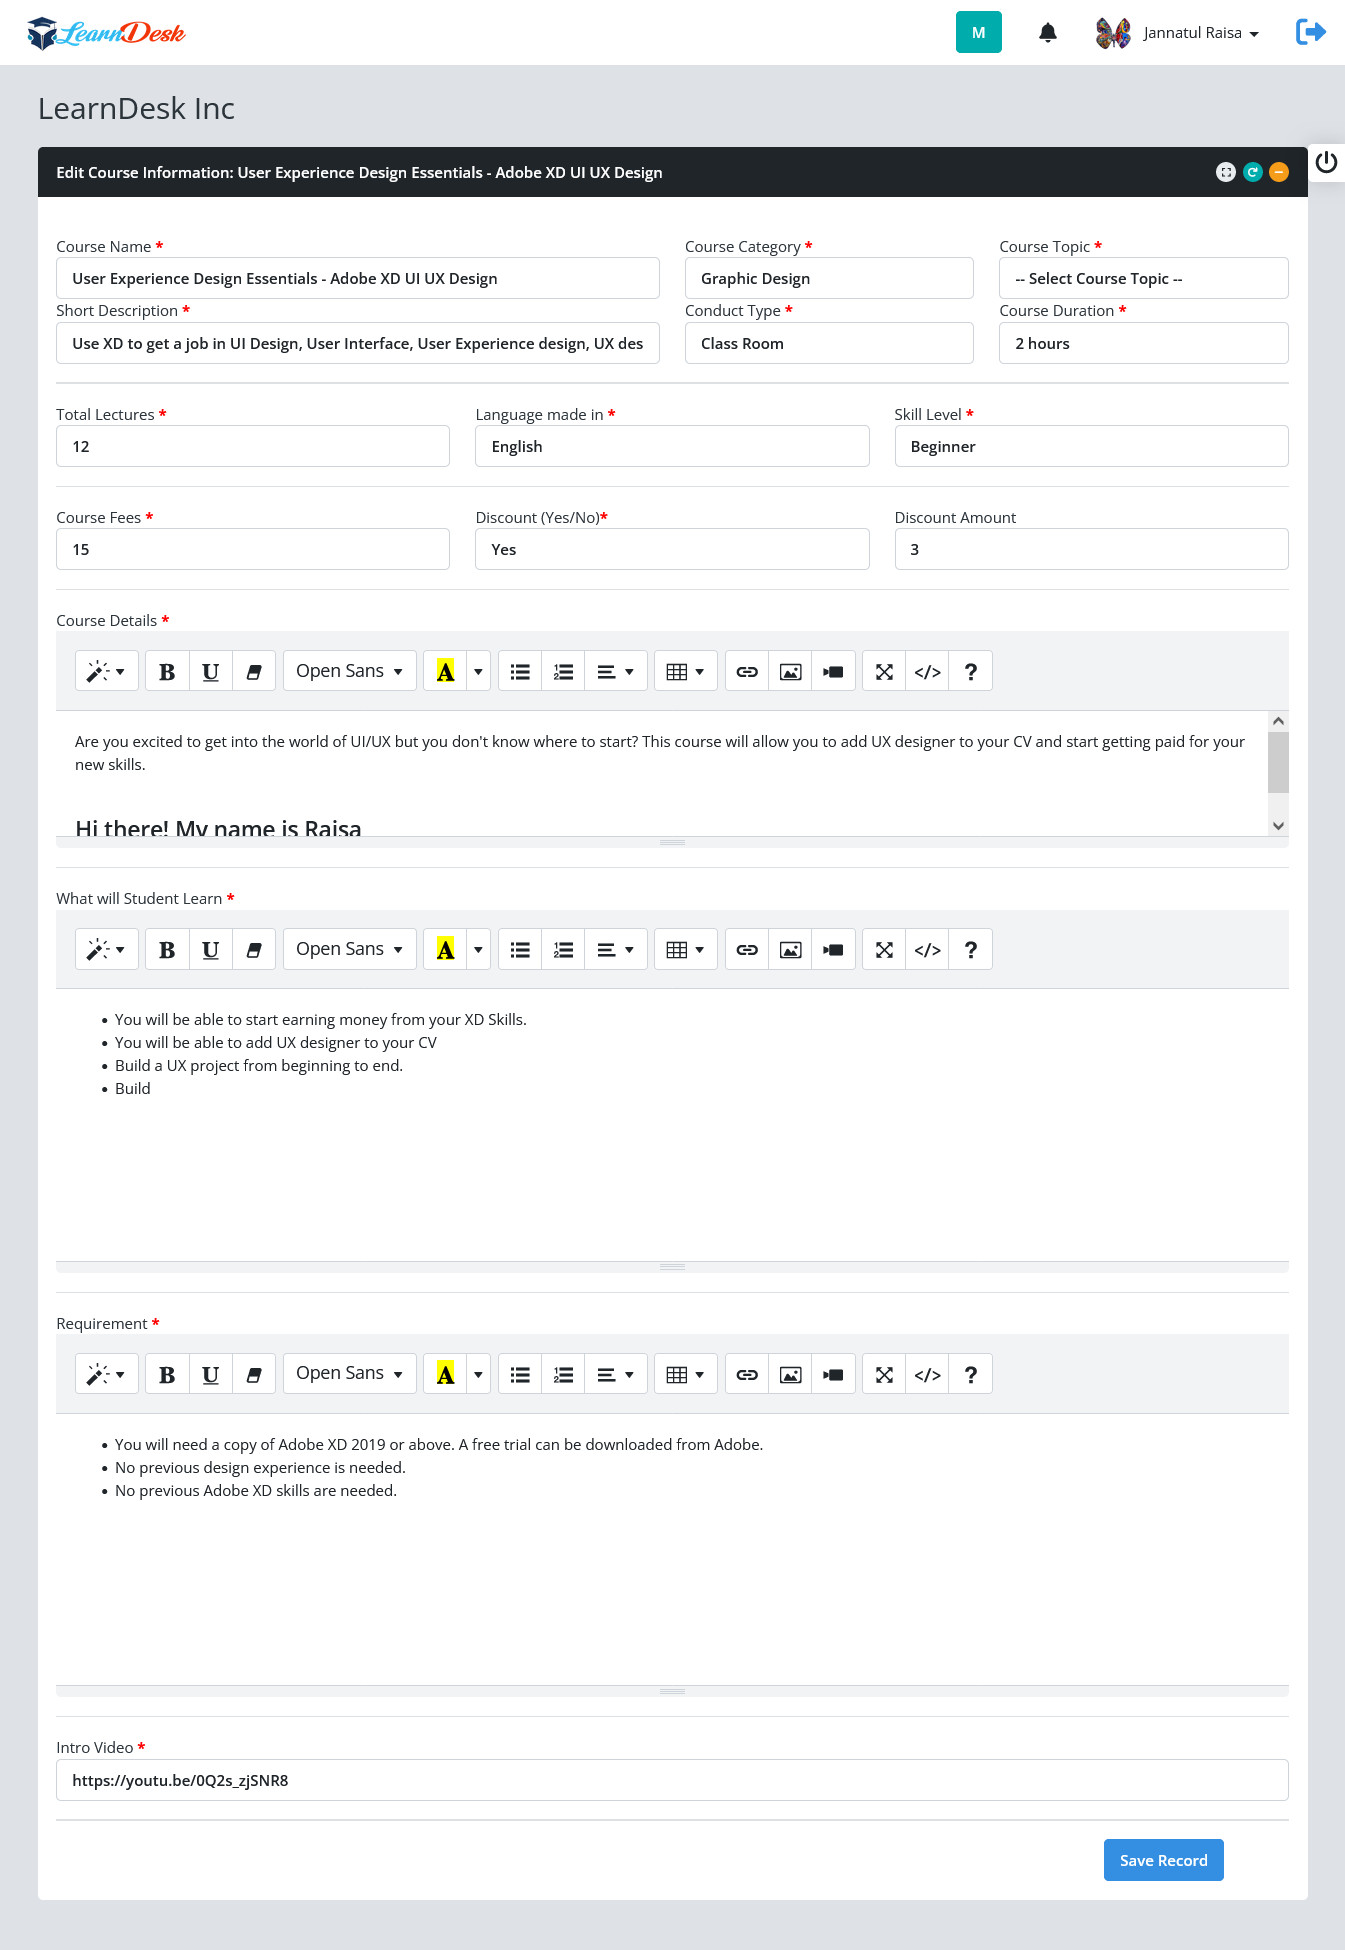
Step 2: You can create new course just click "Manage Course Information" under Courses Section. LearnDesk open a window with relevant information to create course at LearnDesk evnironment. You have to enter Course Name, Course Category, Course topic, Short description, Conduct Type, Course duration, total lecture, Language, Skill level information, fees for this course, discount, discount amount, course details, what will student learn, requirement, Cover picture and intro video. You also add the course detail here. When done, press "Create Course" button to create the course. A system generated message will be generated to confirm successfully created the course.

Step 3: You can view all the courses under "Available Courses Section". The user can easily edit course just clisk the Edit icon at the begining of each record. User also delete the course information just press the Delete button at the end of each record.

Step 4: To edit a course user press the Edit Icon a separate window open with information. You have to change the necessary information and press "Save Record" button to update the course. A system generated message populated to show that course updated successfully and close the window.
Step 5: Press "refresh" button at the top of the "Available Courses" sction to view the effect.
CREATE COURSE OUTLINE/CURRICULUM
You can create course outline under "Courses" section. below is given step by step instruction how to create course outline.
Create Course Outline
Step 1: Click "Manage Course Outline" under Courses Section.
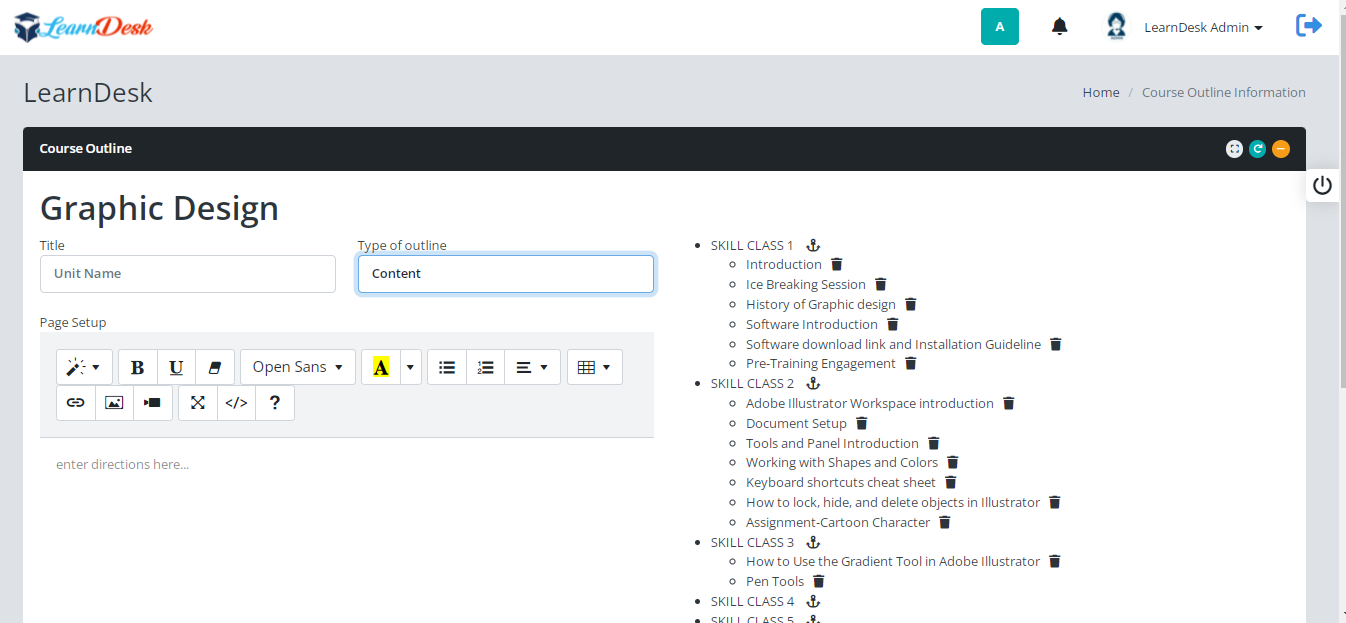
Step 2: LearnDesk open a list of availabe courses information. Click the "Course Outline" link to create course outline of that course. A window is open to create the course outline very easily. 12 types of content to be integrated into LearnDesk as Course Content. You can create outline by class/section one by one.

You can add 12 types of content into course content

Step 3: You can enter unit name and select type from the list and press "Create outline" button to create the outline.


Step 4: To create a Class or Section, enter the Unit Name and Select Section/Class Name then press Create Outline.

Step 5: To create outline with content, enter the Unit Name and Select Content from the list. A page setup field display to enter the outline content. You can add Images, Video, hyperlink or text as content here.
Step 6: To create outline with document/presentation/pdf, enter the Unit Name and Select Presentation/Document/PDF from the list. A Document URL field display, enter the document link and press create outline button

Step 7: To create outline with Video, enter the Unit Name and Select Video from the list. Play option and Video URL field display, Select the play option from the list and enter the video link and press create outline button. You can use all types of video as video content.

Step 8: To create outline with Assignment, enter the Unit Name and Select Assignment from the list and press Create Outline button.

Step 9: To create outline with Test or Exam, enter the Unit Name and Select Test or Exam from the list. select the Test Link, and press create outline button. We will learn how to create test later.

Step 10: To create outline with Survey, enter the Unit Name and Select Survey from the list. select the Survey Link, and press create outline button. We will learn how to create Survey later.

Step 11: You can easily copy outline from other course. To create outline with Clone from another course, enter the Unit Name and Select Clone from another course from the list. Select copy option, select course name, select outline content, and press create outline button.

Arrange Course Outline
You can rearrange course outline very easily by using drag and arragnge facilities. Below is given step by step instruction how to rearrange outline into Learndesk
Step 1: To do so click on "Arrange Outline". A list will display with the default outline arrange patern.

Step 2: Drug the section name up and down to arrange the outline.
Edit Course
To edit a course user press the Edit course a separate window open with information. You have to change the necessary information and press "Save Record" button to update the course. A system generated message populated to show that course updated successfully and close the window.
Step 1: To do so click on "Arrange Outline". A list will display with the default outline arrange patern.
Step 2: Drug the section name up and down to arrange the outline.
CREATE DISCOUNT COUPON
*************
CREATE COURSE BUNDLE
*************
Information Hub
LeanDesk has a section to manage information for Learners beside the courses. In this section, you can manage different club, club content, join request and view club. LearnDesk gives the best user experience in manage those things. Below are given step by step instruction, how this section work.
CREATE NEW INFORMATION CLUB
Step 1: Click "Manage Information Club" under Information Hub section.

Step 2: A window open where you have to enter necessary information to create the information club. When done press "Create club" to create the club.


Step 3: The administrator or mentor can easily edit the information hub just click the edit icon at the begining of each record under "Available Club". You can also delete information club just click the Delete button at the end of each record.

CREATE CLUB CONTENT
Step 1: Click "Club Content Information" under Information Hub section.
Step 2: A window open where you find all active club, click the "create new" link to create new content.

Step 3: upon click "create new" link a new window open, you have to enter necessary information to create content of information club. Enter description and add maximum 5 images for each content. When done press "Create club" to create the club content.


SEND A CLUB JOIN REQUEST
Step 1: Click "JOIN A CLUB" under Information Hub section.
Step 2: A window open where you find all active club, click the "Join Club" button to to send a join request.

Step 3: A system generated message will be displayed to inform the Learners that the request successfully placed.
APPROVE CLASS JOIN REQUEST
The administrator or the mentor who has given the privileged for the system has the authority to approve the join request. Below are given step by step instruction how to approve a join request.
Step 1: Click "Pending join request" under Information Hub section.
Step 2: A window open where you find all requested information, click the ThumbsUp icon to approve the club request. You can also reject the request just press ThumbsDown icon.

Once approve the learner able to visit the club page.
Events
Learnesk has a comprehensive section to manage different events. The administrator and the Mentors who has the privileged, can able to create events. using this section, the users able to create events, also manage notice board. Below are given the step by step instruction how to create events.
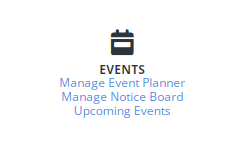
CREATE AN EVENT
Step 1: Click "Manage Event Planner", LearnDesk Open a window where the user have to enter the necessary field values like Event Name, Event Speaker, Event Moderator, Event Date, Event Start Date, Event Max Participants, Event Type, Event Mode, Event Location, Event Duration, Type of duration and Event Details.

Step 2: When entry done, Press "Create Event" to create the event. A system generated message will be displayed to inform user that the event successfully created.
Step 3: Created event will be displayed in Available Events section. You can edit or delete any events. Each record, there is a edit button at the begining of the record and delete button at the end of the record.

Step 4: To edit event, click the edit button, a separate window open with necessary information, change the required information and click "Edit Event" button to update record.

CREATE NOTICE
LearnDesk Notice system allow to show notice for a specific batch or all batches. The Administrator or privileged user can create the Notice. Below are given step by step instruction how to create Notice.
Step 1: Click "Manage Notice Board", LearnDesk Open a window where the user have to enter the necessary field values like Notice Text, Notice for i.e. single batch or all batches, Notice display Date and Notice end date.
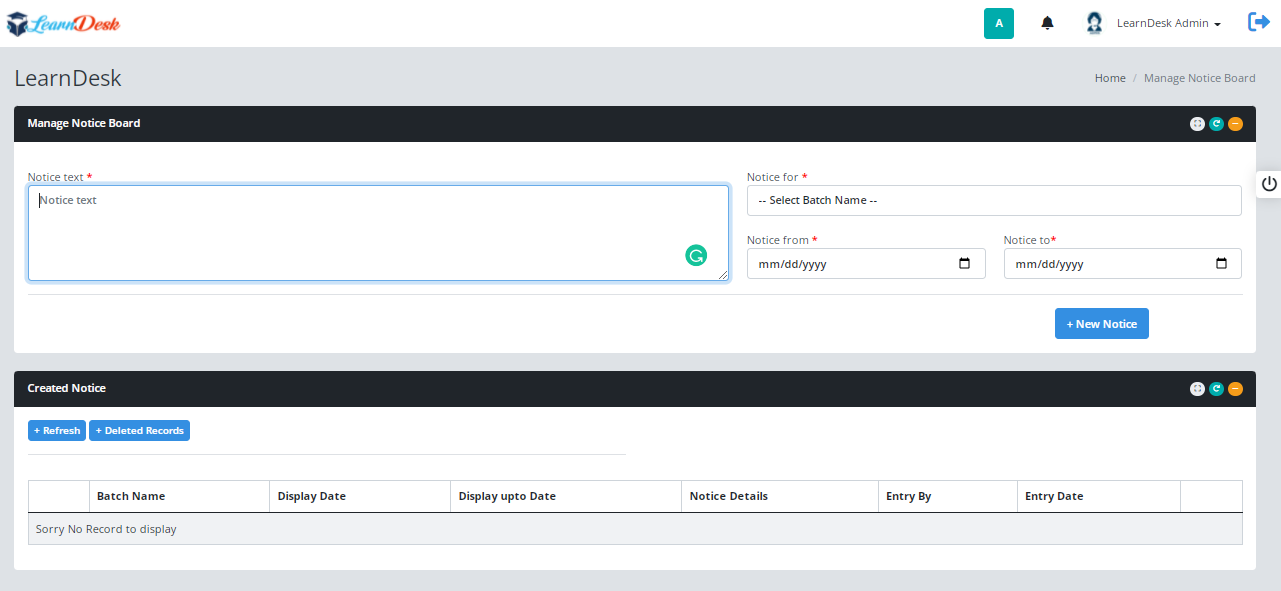
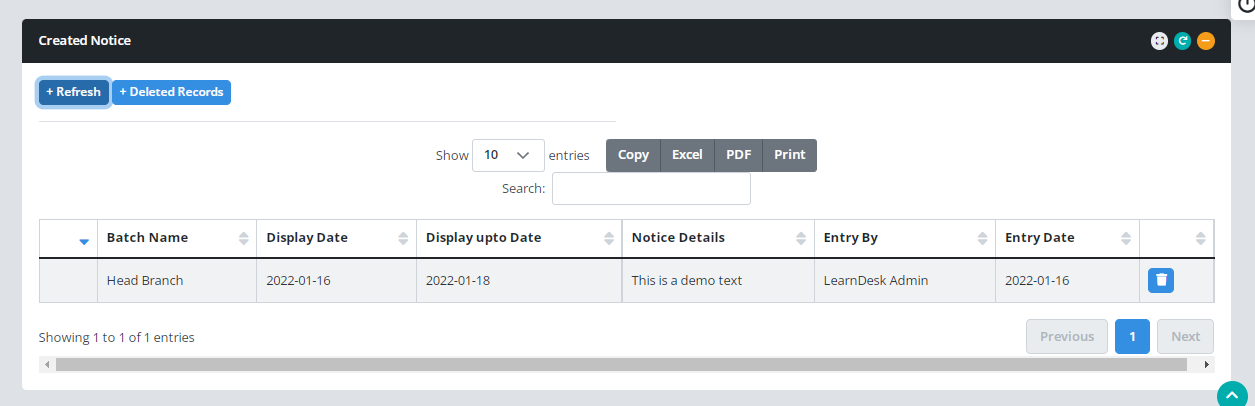
Step 2: Click "New Notice" to create the notice. A system generated message will be displayed to inform the user that the notice created successfully. Created active notice will be displayed on Created Notice section. You can delete the notice at any times just click the delete button at the end of each record.
Discussion
LearnDesk has separate section for Discussion forum. Administrator or Mentors even the learners can create topics for discussion.
CREATE NEW DISCUSSION
Below are given step by step instruction how to create discussion.
Step 1: Click "Manage New Discussion" to create new discussion.

Step 2: LearnDesk open a window where the users can create new topics with details. Here the user have to entry several fields like New topics, Mode of display, category, closing date and topics details. When all entry done, click "Create Topics" to create new topics.

Step 3: Once Create new topics, LearnDesk shown that information in its Available Topics section. User can easily edit any topics just click the edit icon at the beginning of each record, also delete button at the end of each record.

Assignments
Manage Assignment Status
LearnDesk add the assignment feature for your learners to make the course more effective. In LearDesk, instructors can publish assignments based on their courses (If you allow public instructors on your application). But the site admin and instructors can create, publish, update, delete, review, provide marks and comments, and mark as draft their assignments course-wise. For this, you can follow the steps below:
- Log in to the application as an admin.
- Go to your Control Panel
- Click on the "Manage Assignment Status" under Assignments Menu.

System open a new window with courses and batch. Each record there are a Dropup Button. Click the Dropup button and choose pending. This time system shows all pending list of the assignment of that courses.
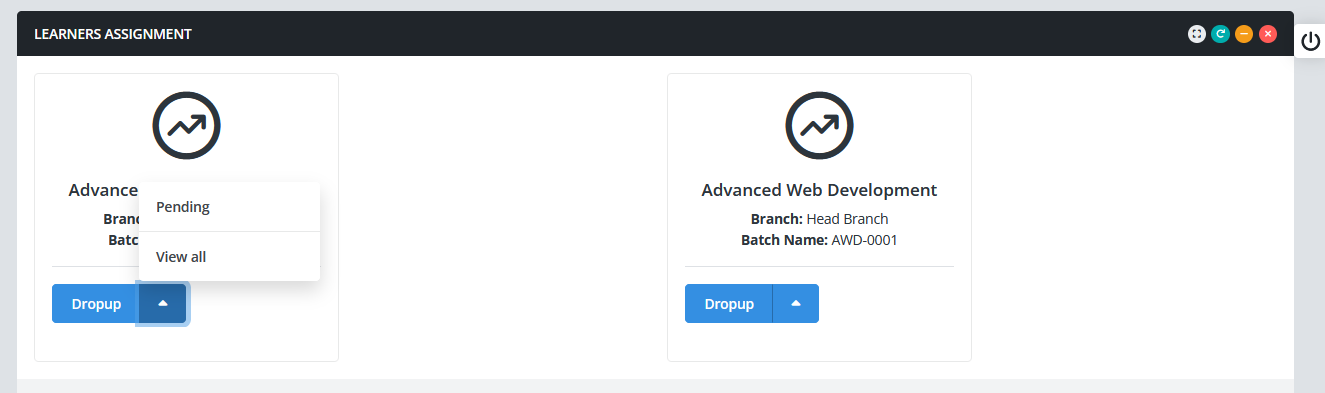
What instructor can do from the list
- View the link provided by the learner just press the cloud icon
- Tell the learner to resubmit the assignment just press the Bin icon
- Assign grade to the student for this assignment just press the Crown Icon.

Assign Grade
- Click the crown icon
- A popup window open, Instructor has to choose 'Passed' from the status list.
- Put Grade into the grade field
- Put your comments into the comments field
- Press Assign Grade button to complete the grade status
Quiz and Survey
LearnDesk has a section to manage Quiz and Survey. Where Admin or Mentor can create unlimited quizzes and surveys. Every quiz or survey can assign an unlimited number of questions and there limitless multiple questions. Currently, LearnDesk support Text, Number, Email, Website, and multiple-choice questions.
Admin or Mentor can set Quiz result, or view the survey result. Below are given step by step instruction, how to create survey or quiz.

HOW TO MANAGE SURVEY
CREATE SURVEY
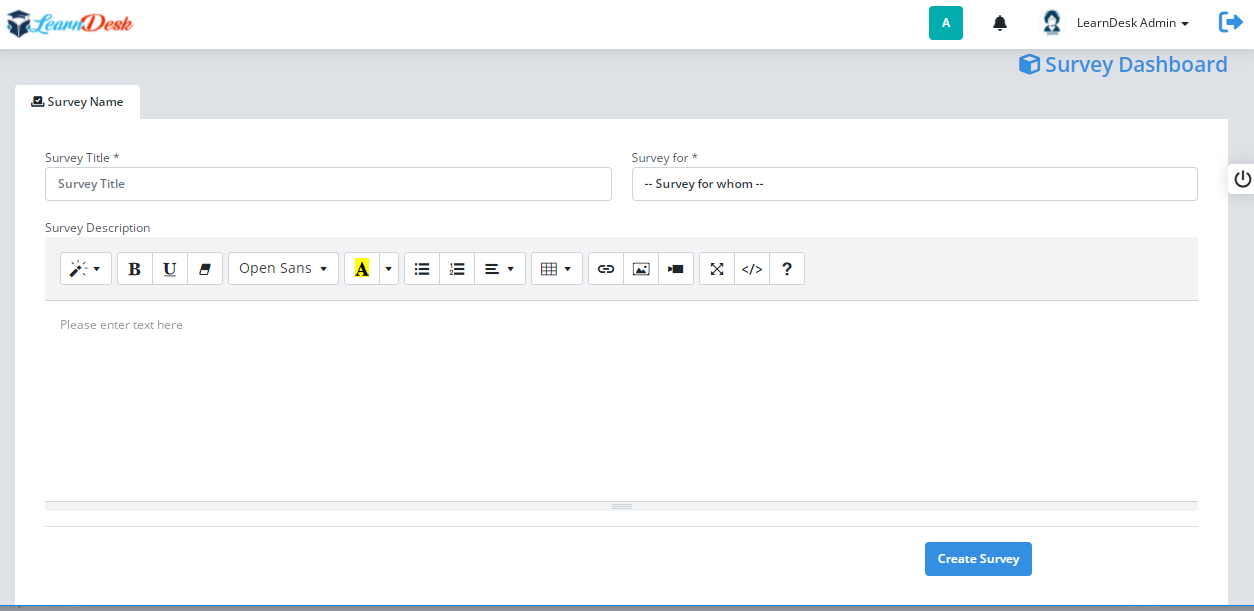
Step 1: Click "Manage Learners Survey" from the Quiz & Survey section and open the Survey Dashboard.

Step 2: Through survey dashboard, You can create New Survey by clicking "Create Form" icon, Add new question in a survey by clicking the eye icon, View survey result by clicking the pie icon. To create a survey, click "Create Form", a window open with necessary field to create survey. You have to provide Survey Title, select survey for from list and put short description for this survey and click "Create Survey" button to create survey.
In LearnDesk, you can create survey for Learners, Mentors and as well as the staff member of your institute.
ADD SURVEY QUESTION
Step 1: When you create any survey, it will display like the below.

Step 2: Click the eye icon, another window open where you can find 3 tabs,
Survey Question: You can create survey question using this tab. You can create survey question like, Text field, Number field, Date field, email field, checkbox- receive multiple answer, Radio button- receive single answer and List item- select single answer. You have to put Question Level, Select Question type, Placeholder, you can set predefine value and tag text. once enter the field value click "Create Question Button" to create the question.

View Survey Form: Once create any question, you have the option to view the survey form. Click "View Survey Form" and press refresh button to view your developed survey form,

sorting Question: You can rearrange the survey question just using the drag and drop question facilities.

VIEW SURVEY RESULT
Step 1: You can view survey result for each survey just click the pie icon at survey dashboard.
Step 2: LearnDesk open a window where you can easily find the survey result.

Now you knows how to create a survey. So we believe, you can now easily handle how to create quiz. We built quiz section almost the same operation as you use as survey.
HOW TO MANAGE QUIZ
CREATE QUIZ
Step 1: Click "Manage Exam Tools" from the Quiz & Survey section and open the Exam Tools Dashboard.

Step 2: Using Exam tools dashboard, You can create New exam by clicking "Create Exam" icon, Add new question in an exam by clicking the eye icon, To create a exam, click "Create Exam", a window open with necessary field to create exam. You have to provide Exam Title, select course name from list and put short description for this exam and click "Create Exam" button to create Exam .

ADD SURVEY QUESTION
Step 1: When you create any exam, it will display like the below.

Step 2: Click the eye icon, another window open where you can find 3 tabs,
Create Exam Question: You can create Exam question using this tab. You can create question like, Text field, Number field, Date field, email field, checkbox- receive multiple answer, Radio button- receive single answer and List item- select single answer. You have to put Question Level, Select Question type, Placeholder, you can set predefine value and tag text. once enter the field value click "Create Question Button" to create the question.

View Exam Form: Once create any question, you have the option to see how its look like in exam form. Click "View Exam Form" and press refresh button to view your developed Exam paper,

sorting Question: You can rearrange the Exam question just using the drag and drop question facilities.

Offline Payment
Offline payment provides offline, cash or local payment gateway features to the learners while purchasing a new course. This gives a payment document upload option during the payment process. After that, the admin can verify the transaction and approve the payment from the backend. Using this you can sell courses to the students by any medium. This part only manage by the Administrator. We will discuss this part later.

To activate your offline payment, you have to follow the simple steps below:
Payment Settings
Step 1: Click "Offline Payment Settings", LearnDesk Open a window where Admin user have to enter all necessary field value for offline payment like Bank information, Bank Account number, routing number, swift code etc.

Step 2: When entry done, Press "Save Information" to save the offline payment information. A system generated message will be displayed to inform user that the Bank information successfully saved.

Step 3: Created Bank information will be displayed in Offline Payment Information section. You can edit or delete store Bank information. There is a edit button at the begining of the record and delete button at the end of the record.

Step 4: To edit Bank Information, click the edit button, a separate window open with necessary information, change the required information and click "Save info" button to update record.
As an admin, you can approve the payment from the backend. For this, you have to follow the steps:
Click 'Manage Payment Status' for the Offline Payment Section. System open a window where, you can overview every detail of the pending payments. You can also approve, suspend, or delete options from the begining of each record.

You can also overview the previously approved payment, suspended payment, and it's every detail.
Users
LearnDesk has a section to manage system users. In this section, you can manage users, upload users, recover users password, and manage users role. LearnDesk gives the best user experience in manage those things. Below are given step by step instruction how to work on differnt modules of this section
CREATE SYSTEM USERS

Click "Manage System Users" to create user. LearnDesk system open a window with different field to receive user information. You have to select branch, enter user first name, last name, email address, contact no, user type, current location, present address, permanent address, select postal address, enrollment date, password and confirm password and bio. When add all information click "Create User" to create user. A system message is generated to inform admin that the user is created successfully.
LearnDesk also allow admin to view the details of users under "All Users" section. Admin can download users list by pressing action button. Admin also have the option to edit the user information if needed. Each record there is a edit icon to edit the user information and a delete button to delete the user. You can find edit button at the begining of each record and delete button at the end of each record.

UPLOAD SYSTEM USERS
Click "Upload System Users" to upload users into LearnDesk and create system users. LearnDesk has a set format and you have to upload the format, prepare the format using users information, convert that files into .CSV, click Choose File and select the .CSV format and press Process button to upload the users. Once upload successfully done, the list of all uploaded user will be displayed at the "All Users" section of LearnDesk.

RECOVER USER PASSWORD
To change the user password, click "Recover User Password" from the Users sction of LearnDesk. LearnDesk open a window where you have to select the branch name, user name, recovery type. If you select recovery type by Manual then you have to put the password, and click the "Process" button to change the password

MANAGE USERS ROLE
This is the most important section for entire LearnDesk. Using this module, you can give privileged to a group of users to access the Learndesk environment. The system admin of LearnDesk system has the role by default to assign others. Click "Manage Users Role", Learndesk open a window where admin need to set the role on LearnDesk. A window open with different menu access. You have to choose the Users Type, Branch name and click Generate button to give a set of access to a group of users.

Monitoring
LearnDesk has a section to monitor system activity by the users. User has the option to view or monitor his/her own activities. But the administrator or assigned users have the option to monitor all activities.

Login Log: To view the login information, click Login Log from the monitoring section.

Audit Log: To view who did what, click Audit Log from the monitoring section.

Live Monitoring: To view what users are doing now, click Live Activity Monitoring from the monitoring section.
My Learning
LearnDesk has a comprehensive section for Learners. In this section, Learners can manage their Progress, Enrollment, Certification, Transcript, Assignments and Class Link. LearnDesk gives the best user experience in manage those things. Below are given step by step instruction how to work on differnt modules of this section.
MY PROGRESS

Click "My Progress" to view learners progress. LearnDesk system open a window with different sections like Overview, Courses, Assignment, Certifications and Timeline. Under Overview Learners can view the profile picture and pregress of the enrolled courses.

Under Courses the learner can upload the course related information by pressing different action button.

Under Assignments section the learner can be informed by the LearnDesk system about their result on different assignments. Learners can view the grade point and comments of the mentors if any. The learner can upload the assignment related information by pressing different action button.

After completion of any courses, Learner can download their certificate under Certifications section. The learner can upload certification information as list by pressing different action button.

At Timeline section, Learners learn about his/her activities on LearnDesk.

MY ENROLLMENTS
Click "My Enrollments" to view learners enrollment related information. LearnDesk system open a window with enrolled courses information. This is the most importent section for the learner in terms of learning process. Here the learner start learning based on a set outline. Click the play button to start learning.
RECOVER USER PASSWORD
To change the user password, click "Recover User Password" from the Users sction of LearnDesk. LearnDesk open a window where you have to select the branch name, user name, recovery type. If you select recovery type by Manual then you have to put the password, and click the "Process" button to change the password
MANAGE USERS ROLE
This is the most important section for entire LearnDesk. Using this module, you can give privileged to a group of users to access the Learndesk environment. The system admin of LearnDesk system has the role by default to assign others. Click "Manage Users Role", Learndesk open a window where admin need to set the role on LearnDesk. A window open with different menu access. You have to choose the Users Type, Branch name and click Generate button to give a set of access to a group of users.
Site Setup
In LearnDesk, by default, admin has all privilege and responsibilities. As an admin, you can access site settings option. Through this menu, Admin can assign LearnDesk work as Online mode or Institute mode Here you can update all the basic info about your application.

For this, you have to navigate:
- Log in to the application as an admin.
- Go to your Control Panel
- Click on the "Manage Site Control" under Site Setup Menu.
System open a window where you have to provide some information to Control the site. In this settings panel, you have to provide the following information:
- Website name
- Website Slogan
- Email Address
- Website Description
- Website Keyword
- Login Page Text
- Site Currency
- Setup Login Page image
- Setup Site Logo
- Setup Site Favicon
- Content for Cookie Policy
- Content for About Us
- Content for Terms and Condition
- Content for Privacy Policy
- Content for Refund Policy
- Site Theme Color
- Site footer Color
- Site Work Mode: Online or Institute mode
Please note that in LearnDesk, you have the option to change your theme color based on your choose. Its open to the admin, who can change the color of the site. After providing the information, you have to select the "Update Now" button to update your information.

Manage Payment Control
After configuring the website settings, you have to manage the payment settings. The admin of the system will handle this menu. Here, you can change, update the payment system of your Application.
For this, you have to follow the steps below:
- Log in to the application as an admin.
- Go to your Control Panel
- Click on the "Manage Payment Control" under Site Setup Menu.
System open a window where you have to provide some information for payment Control of the site. Here, you have to complete four information pages. They are:
- Razorpay
- Stripe
- PayPal
- CCAvenue
- Paytm
Razorpay
You have to provide some basic information about the Razorpay in this form. They are:
- Razorpay Key ID
- Razorpay Secret Key
- Select Razorpay Test Mode
- Select Active status
- When all done Press Save Info button to save record

Please note that if the active status selected No, Razorpay payment procedure will not be activated at Frontend.
Stripe
You have to provide some basic information about the Stripe Payment in this form. They are:
- Stripe Test Pulishable Key
- Stripe test Secret Key
- Stripe Live Pulishable Key
- Stripe Live Secret Key
- Select Stripe Demo Mode (if test purpose)
- Select Active status
- When all done Press Save Info button to save record
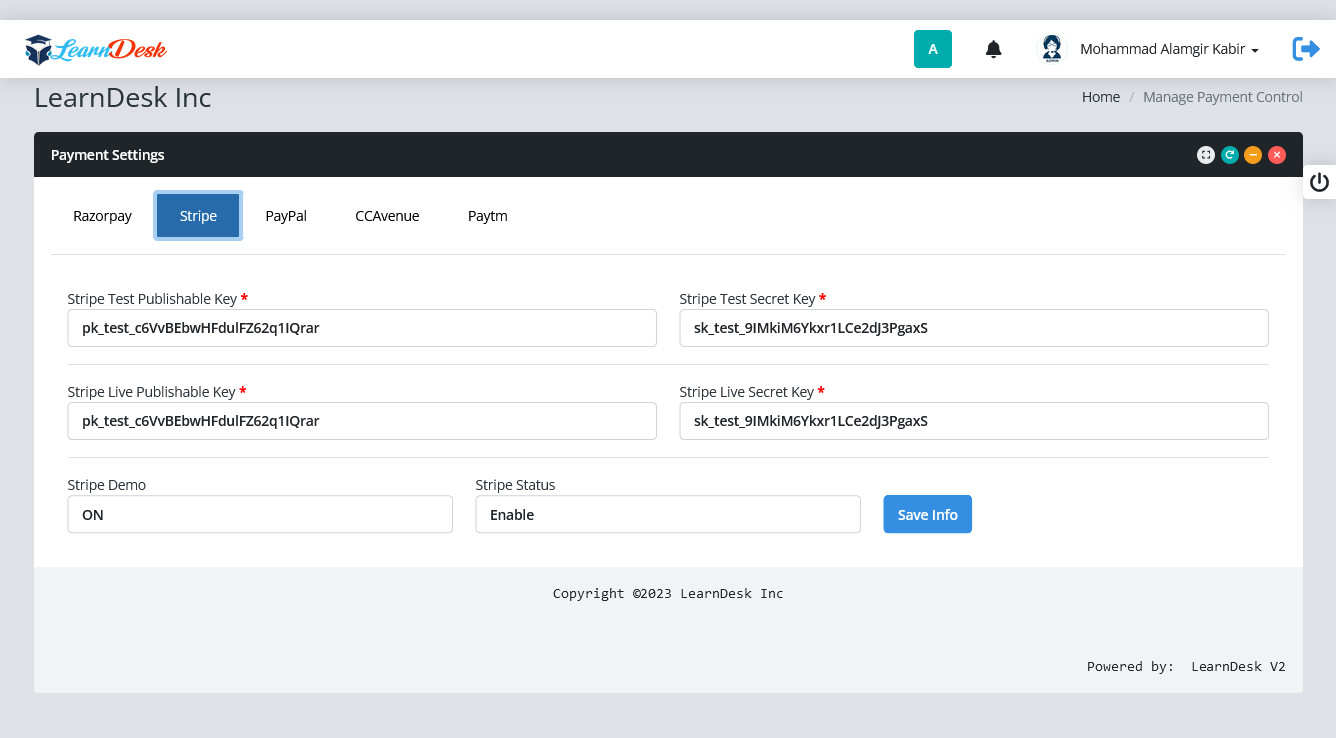
Please note that if the active status selected No, Stripe payment procedure will not be activated at Frontend.
PayPal
You have to provide information about the PayPal Payment in this form. They are:
- Production client id
- Production Secret Key
- Sandbox client ID
- Sandbox secret Key
- Select PayPal Sandbox Mode (if test purpose)
- Select PayPal Payment active status
- When all done Press Save Info button to save record

Please note that if the active status selected No, PayPal payment procedure will not be activated at Frontend.
CCAvenue
You have to provide information of CCAvenue Payment in this form. They are:
- Merchant id
- Working Key
- Access Code
- Select Sandbox mode
- Select Payment active status
- When all done Press Save Info button to save record

Please note that if the active status selected No, CCAvenue payment procedure will not be activated at Frontend.
Paytm
You have to provide information of Paytm Payment in this form. They are:
- Paytm Merchant id
- Paytm Merchant Key
- Paytm Merchant website
- Industry Type ID
- Paytm Channel ID
- Paytm demo
- Select Payment active status
- When all done Press Save Info button to save record

Please note that if the active status selected No, Paytm payment procedure will not be activated at Frontend.
Manage Page Settings
As an admin, you can update LearnDesk website from backend. Previously we have see how to change other pages from backend. Here you can edit every detail of information about your homepage. For this, you have to follow the steps below:
- Log in as Admin
- Log in to the admin panel.
- Click on the "Manage Home Page" option from Site Setup menu.
System open a window where you have to provide some information to Control homepage. In this settings panel, you have to provide the following information:
- Baner Title
- Banner Subtitle
- Select Search Bar visible status
- Select Flash Sale visible status
- Select New Course visible status
- Select Popular courses visible status
- Select Summary visible status
- Select Free Courses visible status
- Select Course Categories visible status
- Select Feature Instructor visible status
- Select Sign up area visible status
- Select images for page banner
Please note that in LearnDesk, you have the option to change frontend website easily including page color.. After providing the information, you have to select the "Save Settings" button to update your information.

eBook
Enhance the features of adding online books for your learners with the eBook. Here you can add, edit, manage and delete books from your site. Also, your learners can purchase and enrich their knowledge by reading ebooks from anywhere, anytime.
If Admin allow instructors to add eBook for website, they can add ebooks along with the courses. Only the admin can create categories for ebooks, and instructors can select the categories during the ebook adding. But this permission depends on the admin, during providing role of the instructor.

Create eBook Category
Step 1: After clicking the "eBook Category" button, system open a window where you have to provide some information to create eBook category. Here, you have to enter the necessary field values like Category Name, Category icon, and category Details.

Step 2: When entry done, Press "Create Category" to create the eBook Category. A system generated message will be displayed to inform user that the event successfully created.

Step 3: Created Category will be displayed in Available eBook Category section. You can edit or delete any category. Each record, there is a edit button at the begining of the record and delete button at the end of the record.
Step 4: To edit category, click the edit button, a separate window open with necessary information, change the required information and click "Save Category" button to update record.

eBook Page Settings
After clicking the "eBook Page Settings" button, system open a window where you have to provide some informations to create eBook Page Settings. Using this menu Admin of the system, can do the bellow.
- Frontend eBook Page title.
- Frontend eBook page sub title
- Control/Assign eBook category display at home page
- Control/Assign eBook list display at home page
- Control/Assign eBook banner at eBook page
Once click the eBook Page Settings, You have to provide some basic information about the settings
- Add eBook page title.
- Add eBook page subtitle.
- select and set entry date display on each eBook (Visible/Invisible)
- select and set category list display at home page (Visible/Invisible)
- select and set eBook list display at home page (Visible/Invisible)
- select eBook page banner
Once done, click Save Settings to save the record

Manage eBook Info
Admin or the user who received privilege from admin can create the eBook information. Below are given step by step instruction how to create eBook info
Step 1: After clicking the "Manage eBook Info" button, system open a window where you have to provide some informations to create eBook information. Here, you have to enter the necessary field values like
- eBook Title
- Select eBook Category
- Publication Name
- Select Language
- Year of publication
- Edition
- Price
- Discount
- Select eBook Banner image
- Select eBook Thumbnail image
- eBook Preview file - PDF
- eBook Complete file - PDF
- eBook Description
Step 2: When entry done, Press "Create ebook" to create the eBook informtion. A system generated message will be displayed to inform user that the eBook successfully created.

Step 3: Created eBook will be displayed in Available eBook section. You can edit or delete any eBook. Each record, there is a edit button at the begining of the record and delete button at the end of the record.

Step 4: To edit ebook, click the edit button, a separate window open with necessary information, change the required information and click "Update eBook" button to update record.

Blog
Publish your blogs with LearnDesk, you can also manage blog settings as an admin. You can give permission for other users to create blog on your application. For these, you have to configure the blog settings.

Blog Category
To publish a blog, you have to create blog category. The admin or the privileged users can create the blog categories. Also, you can update or remove a blog category from the application any time you want. To add a new category, you can follow the steps below:
- Log in to the site as an admin
- Click on the "Blog Category".
Step 1: After clicking the "Blog Category" button, system open a window where you have to provide some information to create Blog category. Here, you have to enter the necessary field values like Category Name, and category Details.

Step 2: When entry done, Press "Create Category" to create the Blog Category. A system generated message will be displayed to inform user that the event successfully created.
Step 3: Created Category will be displayed in Available Blog Category section. You can edit or delete any category. Each record, there is a edit button at the begining of the record and delete button at the end of the record.

Step 4: To edit category, click the edit button, a separate window open with necessary information, change the required information and click "Save Category" button to update record.

Blog Category Page

Create New Blog
The site admin can create/publish a blog within a few clicks. He can also manage existing blog whenever he wants. You can follow the steps as a site admin to publish a blog on your application site.
- Log in to the application as an admin.
- Go to your Control Panel
- Click on the "Add Blog" option under the Blog menu.
Step 1: After clicking the "Add Blog" under Blog menu, system open a window where you have to provide some information to create Blog. Here, you have to enter the necessary field values like below.
- Blog Title.
- Select Blog Category
- Put Blog Keywords
- Blog Description.
- Blog Banner
- Blog Thumbnail

Step 2: When entry done, Press "Save Blog" to create the Blog. A system generated message will be displayed to inform user that the Blog successfully created.

Step 3: Created Blog will be displayed in Available Blog section. This Blog section has three parts. You can click each of the button to display the list. They are describe below
- Need Approval: Pending Blog need to approve by the system admin or privileged user
- Approved: List of all approved and published blogs
- Deleted: List of all deleted blogs.
You can edit or delete any blog. Each record, there is a edit icon at the begining of the record and delete icon in Approved list at the end of the record.
Step 4: To edit blog, click the edit icon, a separate window open with necessary information, change the required information and click "Update Blog" button to update record.

A system generate message will be displayed to inform the user that branch information successfully updated.
Add Blog Page

Pending Blog
As you know the site admin can publish a blog within a few clicks. That means whoever add a blog in the system need to be approved for publish it in the site. LearnDesk system has that option to allow the admin or provileged users to approved the blog for publish in the site.You can follow the steps as a site admin to publish a blog on LearnDesk site.
- Log in to the application as an admin or privileged user.
- Go to your Control Panel
- Click on the "Pending Blog" option under the Blog menu.
- System open a window with list of pending blogs
- There are two icons at the begining of each records.
- The icons are Thumb-up and Thumb-Down, Thumb-Up allows to approve the record and publish that blog in site. On the other hand Thumb-Down icon allows to delete the blog from the site

Blog Page Setting
LearnDesk system has that option to manage or control frontend page control dynamically. You as admin or privileged users can do the following
- Log in to the application as an admin or privileged users.
- Go to your Control Panel
- Click on the "Blog Page Setting" under the Blog menu.
A separate window open to collect all the necessary information to run blog in LearnDesk environment. The information are listed below
- Setup Blog Page Title
- Setup Blog Page subtitle
- Control to display Instructor name on Blog
- Hide/display blog category at home page
- Hide/display blog at home page
- Banner at Blog page
When entry done, Press "Save Settings" button to create the Blog settings. A system generated message will be displayed to inform user that the settings has be successfully stored in the system.

Tutor Booking
With the Tutor booking LearnDesk allow, your learners to choose instructors for different classes. Your learners can book your instructors for classes. Instructors can conduct their classes according to their regularly scheduled class timetable. Your learners have to pay for booking their instructors. As an admin, you can earn the commission if your learners pay for booking instructors through your application.
Tuition Page Settings

After clicking the "Tuition Page Settings" button, system open a window where you have to provide some informations to create Tuition Page Settings. Using this menu Admin of the system, can do the bellow.
- Frontend Tuition Page title.
- Frontend Tuition page sub title
- Control/Assign banner at Tuition page
Once done, click Save Settings to save the record

Live Class Setting
In LearnDesk, we added different features to enhance the learners skill, and the "Live Class Setting" specially Zoom Class Settings is one of them. After configuring this option, the admin and instructors can take live video classes on the zoom live streaming service.
Step 1: After clicking the "Live Class Setting", system open a window where you have to provide some informations to create Zoom Live Class information. Here, you have to enter the necessary field values like
- Zoom Meeting ID
- Zoom Meeting Password
- Zoom Api Key
- Zoom Secret Key
Step 2: When entry done, Press "Save Info" to create the live class informtion. A system generated message will be displayed to inform user that the live class successfully created.
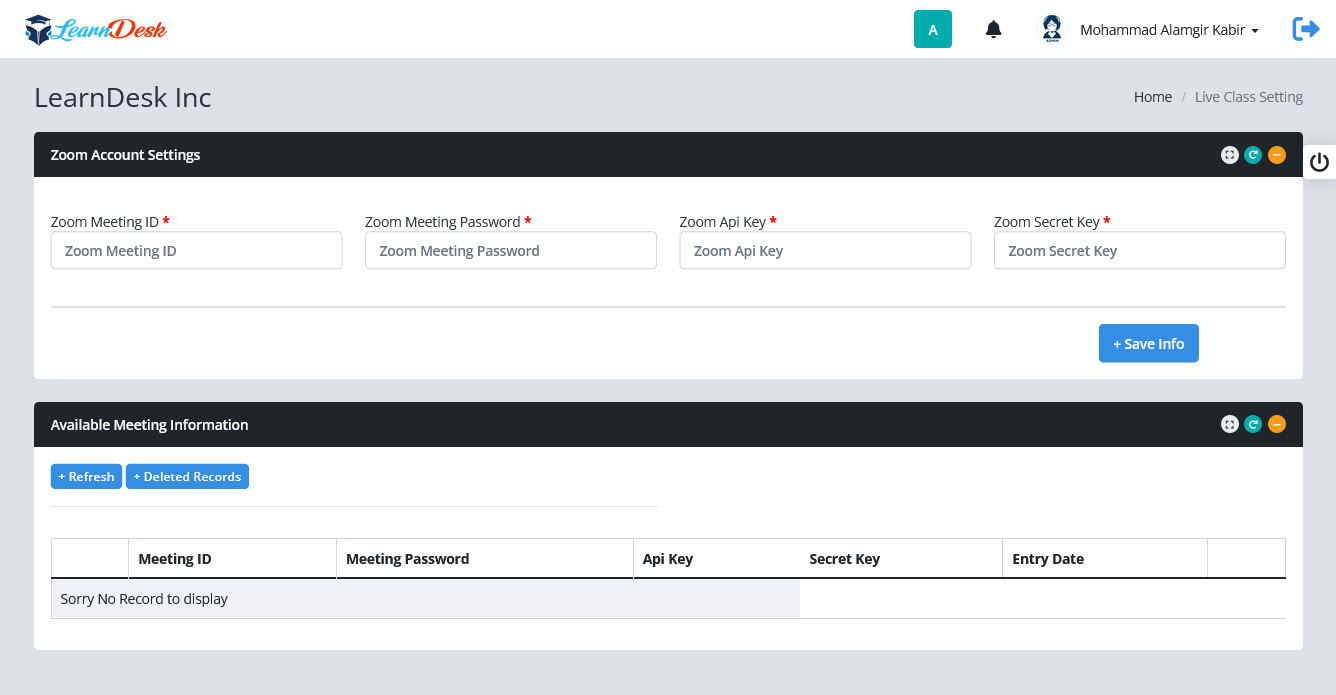
Step 3: Created Live Class will be displayed in Available Meeting Information section. You can delete any Class info. Each record, there is a delete button at the end of the record.
Add Tuition Information
Your instructors or site admin can add the schedule for tuition. Learners can book the instructor based on the instructor's published schedule. Instructors add multiple class schedules in the application. To add the schedule, your instructors can follow the steps below:.
- Log in to the application as an instructor.
- Go to your Control Panel
- Click "Add Tuition Information" under Tutor Booking Menu.
- Provide a topic.
- Select category.
- Choose the class type.
- Select the tuition fee type fixed/hourly. (If the instructor chooses the "Fixed" option, students have to pay after completing the class or session. If the instructors choose the "Hourly" option, students have to pay hourly during the class or session)
- Add the price.
- Add the tuition type. (Students can select the "Single time/Repeated day" option. If the student selects the "Repeated day" they can custom days for the schedule. Then Select the customized date)
- Set day from a week for the schedules.
- Add language
- Add schedule date
- Add start time and end time
- Set the class duration.
- Add Banner image
- Click on the "Create Tuition" button.
When entry done, Press "Create Tuition" button to create tuition. A system generated message will be displayed to inform user that the live class successfully created.

Created Tuition will be displayed in Available Tuition section. You can edit or delete any Tuition information. Each record, there is a edit button at the begining of the record and delete button at the end of the record.

To edit Tuition, click the edit button, a separate window open with necessary information, change the required information and click "Update record" button to update record. A system generated message populated to show that course updated successfully and close the window.
Student Bookings
Learner can book tutor to inhance their knowledge and skills. Sometimes they need to know about their tutor booking information. To do so, Learner can Click the 'Student Bookings' Menu under Tutor Booking section. System open a window with a list, where all the booking information will be display.
Booked Tuition
Learner can book tutor to inhance their knowledge and skill. In LearnDesk, learner can book tutor from website or from their control panel. In Control panel, to book tutor, learner have to do the following.
- Log in to the application as an Learner.
- Go to Control Panel
- Click "Booked Tuition" under Tutor Booking Menu.
- LearnDesk open a window with list of available tuition information.
- Click Book Now icon to book the tutor. LearnDesk system generate a message and bring the learner to cart.
- Press Checkout button
- Choose payment gateway and pay fees to hire the tutor


Affiliate
Affiliate marketing is a method of earning money by promoting a company's products or services for sales purposes. An affiliator can earn commissions every time by selling the company's products or services. It sounds like a commission-only sales representative.

In LearnDesk, an affiliator can apply for affiliate marketing. Admin can approve and manage the affiliate users. The affiliators can generate links for promoting courses. If any student purchases the courses through that links, the affiliator will get a commission. They can overview their revenue history, and they can make requests for their revenue withdrawal. Only site admin can grant their requests and pay their commissions through the online payments gateways.
Affiliation Settings
In LearnDesk, you can easily setup affiliation for site. To do so follow below
- Log in to the application as an admin.
- Go to your Control Panel
- Click on the "Affiliation Setup" under Affiliate Menu.

LearnDesk open a window where you have to set the value for each field. This will manage the commission value of different items and the page setup of the affiliation. You have to put the follow field value
- Select Course Affiliator (Yes/No)
- If course affiliator value set 'Yes', put course commission percentage. Put 0 if course affiliator value set 'No'
- Select Tuition Affiliator (Yes/No)
- If Tuition affiliator value set 'Yes', put Tuition commission percentage. Put 0 if tuition affiliator value set 'No'
- Select eBook Affiliator (Yes/No)
- If eBook affiliator value set 'Yes', put eBook commission percentage. Put 0 if eBook affiliator value set 'No'
- Page title - Frontend
- Page Banner - Frontend
- Description
When entry done, Press "Save Settings" to save the Affiliate Setup information. A system generated message will be displayed to inform user that the Setup information successfully saved.
Create an Affiliator
An admin can manually add, suspend, or approve an affiliator in LearnDesk. Every user in the application can apply for becoming an affiliator if the admin allows the public affiliation. If the admin disallows the public affiliation, Then only the admin can appoint an affiliator from the existing users or create a new user as well as an affiliator in LearnDesk. The admin can overview affilators commissions history, export CSV/PDF files, approve pending payments, see complete payouts, and set affiliate commission percentage.
However, LearnDesk has a section to manage Affiliator. To create an affiliator the admin must fill the following information..
- First Name
- Last Name
- Email Address
- Contact No
- User Type
- Current Location
- Present Address
- Permanent Address
- Postal Address
- Join Date
- Put password and confirm password
- Bio

LearnDesk also allow admin to view the details of affiliator under "All Affiliators" section. Admin can download list by pressing action button. Admin also have the option to edit affiliator information if needed. Each record there is a edit icon to edit the affiliator information and a delete button to delete the affiliator. You can find edit button at the begining of each record and delete button at the end of each record.
Affiliate History
The admin can overview the affiliation history with the custom date filtering feature easily. Also, he can search the history based on your existing affiliator. In this history option, and admin can see every affiliators details. An admin can also export their history as CVS and PDF files.
To preview affiliators history, admin can follow the steps below
- Log in to the application as an admin.
- Click on the "Affiliation history" under Affiliate menu.

Affiliator List
If a user request for becoming an affiliator (Only when public affiliation is allowed by the admin), the admin can approve or decline their request. If the request gets approved by the admin the user becomes an active affilator. Then the admin can also suspend or remove an affiliator from the affliation system.
To approve a pending affiliator, the admin can follow the steps below:
- Log in to the application as an admin.
- Click on the "Affiliator List" under Affiliate menu.

Customer Support
"Customer support" enhances the feature to provide professional supports to LearnDesk users. Anyone can send the support ticket concerning any issue about the application.

Ticket List
As an admin, you can view or close tickets, add supports category, or manage macro. To manage the user's tickets, Admin have to navigate:
- Log in to the application as an admin.
- Go to your Control Panel
- Click on the "Ticket List" under Customer Support Menu.
Here, you can overview:
- Ticket ID
- Title
- Description
- Category
- Priority
- Entry Date
- Action

In this "Action" you can reply, close, or delete the tickets. To answer the tickets, you have to click the "View" from the "Action" section. After that:
- Answer the tickets.
- Upload any file from your device.
- Apply the macros.

To close or delete the ticket, you have to click the "Ticket close" or "Delete" button. For confirmation, select the "Continue" button.
Support Category
Admin can also create support categories to provide professional support. To add a category, admin have to follow the steps:
- Log in to the application as an admin.
- Go to your Control Panel
- Click on the "Support Category" under Customer Support Menu.
After clicking the "Support Category" button, system open a window where admin have to provide some information to create support category. Here, Admin have to enter the necessary field values like Category Name, and category Details.

When entry done, Press "Create Category" to create the Support Category. A system generated message will be displayed to inform user that the category successfully created.
Created Category will be displayed in Available Support Category section. You can edit or delete any category. Each record, there is a edit button at the begining of the record and delete button at the end of the record.

To edit category, click the edit button, a separate window open with necessary information, change the required information and click "Save Category" button to update record.
Macro
Using Macro, Admin or privileged user can add, edit and delete the macro. To add a new macro, they have to follow the steps:
- Log in to the application as an admin.
- Go to your Control Panel
- Click on the "Macro" under Customer Support Menu.
After clicking the "Macro", system open a window where admin have to provide some information to create macro. Here, admin have to enter the necessary field values like Macro Name, and Description.

When entry done, Press "Save Macro" to create the Macro. A system generated message will be displayed to inform user that the Macro successfully created.
Created Macro will be displayed in Available Macro section. You can edit or delete any Macro. Each record, there is a edit button at the begining of the record and delete button at the end of the record.

To edit macro, click the edit button, a separate window open with necessary information, change the required information and click "Save Macro" button to update record.
Manage Support Ticket
As an user of LearnDesk, you can create a ticket. For this, you have to navigate:
- Log in to the application as an admin.
- Go to your Control Panel
- Click on the "Manage Support Ticket" under Customer Support Menu.
After clicking the "Manage Support Ticket", system open a window where admin have to provide some information to support ticket that are listed below.
- Title.
- Select category type
- Select the priority
- Provide description
- Select a file from your device
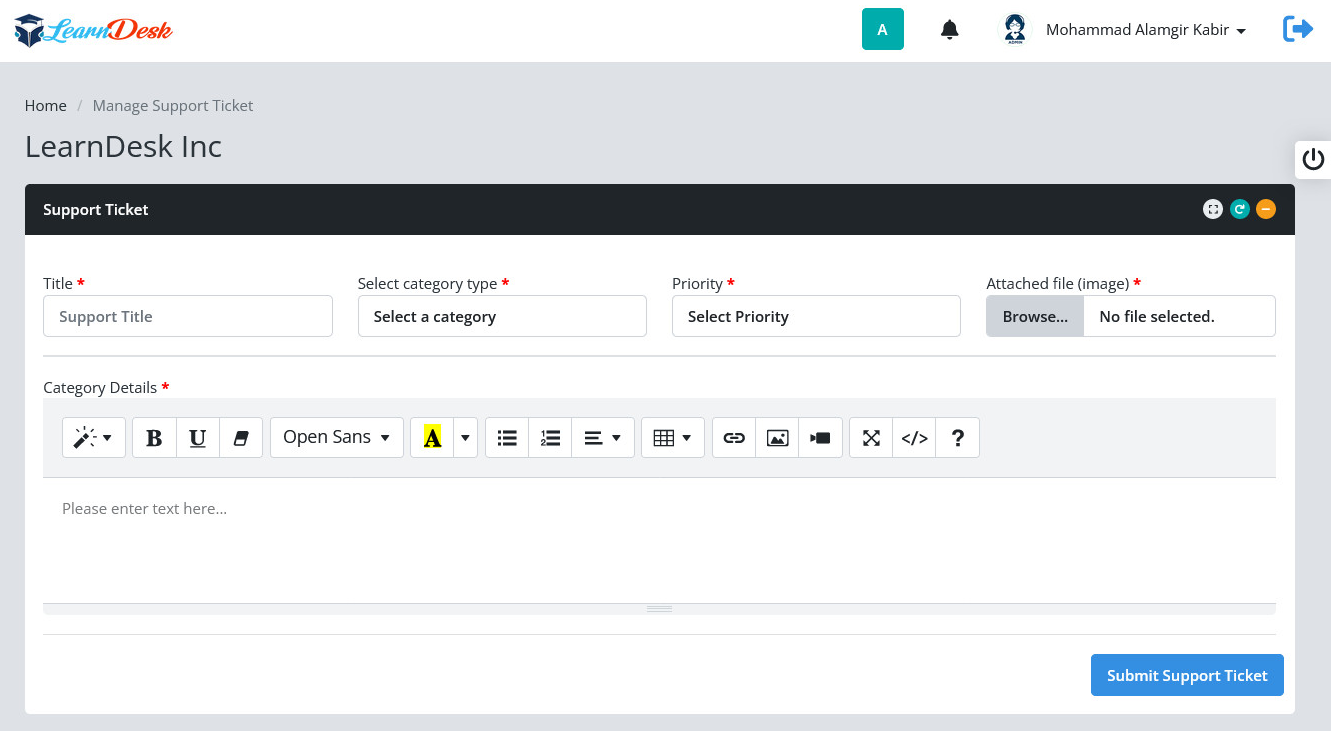
When entry done, Press "Submit Support Ticket" to create the ticket. A system generated message will be displayed to inform user that the ticket successfully created.
Created ticket will be displayed in Available Support Ticket section. You delete any record pressing delete button at the end of the record.

Reports
LearnDesk has a section to manage Reports. In this section, you can generate reports on Learners Information, Batch Information, Assignment Information, Learners received certificate, and class attendance.

How To Contact Us?


What else
Nevertheless it's still not finished. We like to improve it wherever we can and appreciate your feedback.